
Rubric can be used to evaluate student work based on defined criteria and scales. You can create multiple rubrics in your course. Rubrics consist of rows and columns. The rows correspond to the criteria. The columns correspond to the level of achievement that describes each criterion. Rubrics can be exported and given to other users. In blackboard you can apply a rubric to the following tools where students can submit work.
- Assignments
- Essay, Short Answer, and File Response test questions
- Discussion Board
- Blogs
- Journals
- Wikis
There are five types of blackboard rubric:
- No Points: Provide feedback only.
- Points: Each level of achievement has a single point value.
- Point Range: Each level of achievement has a range of values.
- Percent: Each item’s possible points determines the percentage.
- Percent Range: Each level of achievement has a range of values. When you grade, you select the appropriate percentage level for a particular level of achievement. The system calculates the points earned by multiplying the weight x achievement percentage x item points.
For the blackboard help on rubrics: https://en-us.help.blackboard.com/Learn/Instructor/Grade/Rubrics
For further information click to expand the links below:
Note: Rubrics created in this way are for blackboard assignments, this is NOT for Turnitin. You can’t use a blackboard rubric in Turnitin.
- There are 2 ways to create a rubric
(a) From your blackboard module go to module tools > Rubric
This will open the rubric page click on “Create rubric”
OR
(b) From the grade setting section in the options of a blackboard tool - Turn on grade by selecting the grade option this will open up more options. Click on “Add Rubric” a menu will appear select “Create new rubric”
- From the Create Rubric page enter a title and optional description.
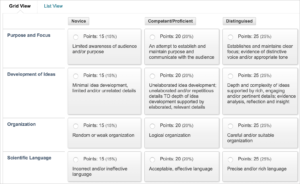
- A rubric screen:
- Choose a Rubric Type from the menu:
- No Points: Provide feedback only.
- Points: Each cell has a single point value. If you select this during marking the student will be awarded that number of points for that criteria.
- Point Range: Each cell has a range of values. Enter from the lowest (i.e. 0) to the top of the first range (e.g 40). The second cell range should start from the top of the previous Cells range. Continue to the top of the range. You’ll be able to select decimals using this method.
- Percent: Each cell has a single percentage that determines the percentage for that criteria. The top cell should be 100% Each criteria is weighted and the weighting should add up to 100%
- Percent Range: : Each cell has a percentage range that determines the percentage for that criteria. The lowest cell’s range should start at 0% The highest cell’s should go to 100%. The range for each level of achievement should start where the previous one left off. Each criteria is weighted and the weighting should add up to 100%
- Click “Add Row” to add a new criterion to the bottom of the grid.
- Click “Add Column” to add a new level of achievement to the grid.
- If you need to delete a row or column, click the drop down arrow to access the menu and select Delete.
- To change a row or column’s title, click the drop down arrow to access the menu and select Edit. Then type the new title in to the box and click Save.
- Type a point or percentage value for each row and column as necessary.
- Type a description for the criteria and the associated level of achievement. Each cell has a 1,000-character limit.
- Click Submit.
Rubrics can be modified after creation. Warning! If the rubric has been used to score student papers, modification of the rubric will not be allowed.
- From your blackboard module go to module tools > Rubric. This will open the rubric page
- Click on the gray dropdown arrow next to the rubric you want to edit to open the menu
- Choose edit
- Change the rubric as needed
- Click Submit.
- From your blackboard module go to module tools > Rubric. This will open the rubric page
- Click on the gray dropdown arrow next to the rubric you want to duplicate to open the menu
- Choose copy
- Click Submit.
To use a rubric the tutor must first attached a rubric to the assignment this can be done at the point of creating the assignment or afterwards editing the assignment options.
- Go to the assessment or tool and click in the gray drop down arrow and choose edit
- Scroll down to the Grading section and click on “Add rubric” and choose “Select rubric”
- A pop up window will appear. Click the check box next to the rubric you want
- Click Submit.
- You will now see the attached rubric. There are buttons to delete,view and edit the rubric here. There is allso an option for setting the rubric for use during either Grading or Secondary marking
- Select if and when you would like students to see the rubric by hovering over the right icon in the “Show rubric to students” column and choosing an option.
Show Rubric to Students has four options for rubric visibility:- No: Students can’t view the rubric. Note: with this option students won’t see feedback entered into the rubric until this is changed.
- Yes (With Rubric Scores): Students can view the rubric when you make the item available, including possible point or percentage values.
- Yes (Without Rubric Scores): Students can view the rubric when you make the item available, but they can’t see the possible point or percentage values.
After Grading: Students can view the rubric only after you’ve finished grading their submissions. Note: students will be able to see this as soon as you mark it even if it is before the due date. They will also be able to show it to students who have not yet submitted.
- Click Submit when you are happy with all the options.
From the Rubric page tutors can export rubrics to share with other instructors or import rubrics to use when grading papers.
To export a rubric
- From your blackboard module go to module tools > Rubric. This will open the rubric page.
- Tick the check box next to the rubric you want to export
- Click on the export button. This will open the Rubric export setting
- Choose the where you want to save the file. Note we recommend your local computer
- Click Submit.
- This will take you to the download rubric page, Click the download button
- How the file will now download will depend on your browser. In your Download folder you will now have a .zip file named “Rubric_ExportFile_” followed by the module name and some random numbers. This is the file you should keep or give to others if you wish to share it.
To import a rubric
- From your blackboard module go to module tools > Rubric. This will open the rubric page.
- Click on Import Rubric
- Click on Browse My Computer
- Find the exported .zip file named “Rubric_ExportFile_” followed by the module name and some random numbers, and click Open.
- The file name will now appear as the selected file.
- Click Submit.
- You will now see the rubric Import Result click on the OK button
- This will return you to the rubric page you will now see the imported rubric in the list
Before you start marking with a rubric double check that the rubric has no errors, as once you start marking you can’t change the rubric without deleting all the marking you have already done.
Note: If the Grade Centre column for this assessment is not hidden students will be able to see grades and feedback as soon as you enter them. See below to find out how to hide a column.
For the blackboard help on rubrics go to https://en-us.help.blackboard.com/Learn/Instructor/Grade/Rubrics/Grade_with_Rubrics
To start grading first you need to go to the module in blackboard and then click on the Grade Center tab in the left menu of the module. You then need to click on “Needs Marking” to open the list of submitted assignments for that module. Click on the assignment you wish to mark.
You can use the rubric either in a popup rubric window showing the full details or in the Grading panel at the side of the paper.
Using the Grading Panel to Grade
- Expand the grading panel by click on the drop down arrow to access the rubric.
- Select the rubric title to expand it in the panel.
- Optionally, select the check boxes to Show Descriptions for criteria and to Show Feedback
- Select an achievement level for each criterion.
- Optionally, if you selected Show feedback, type feedback pertaining to that criterion.
- A running “Raw Total” score appears as you make point selections. Optionally, type a score in the Change the number of points box to override the selected score.
- Optionally, type overall rubric feedback for the student.
Note: this will only be seen by students if they click on the rubric button - Select Save Rubric to add the rubric score to the Attempt
- Add more feedback not linked to the rubric this will be visible to student even if the rubric is hidden from the students and they don’t click on the rubric button.
- Click Submit to submit the score, and all the feedback.
Using the Rubric in Window to Grade
- Expand the grading panel by click on the drop down arrow to access the rubric.
- Click the View Rubric in Window button to open the rubric in a separate window and grade from there.
- Select an achievement level for each criterion.
- Optionally, you can type in feedback pertaining to that criterion.
- A running “Raw Total” score appears as you make point selections. Optionally, type a score in the Change the number of points box to override the selected score.
- Optionally, type overall rubric feedback for the student.
Note: this will only be seen by students if rubric grading score is set to be visible and if the student click on the rubric button - Click Save to add the rubric score to the Attempt score field.
- Add more feedback not linked to the rubric this will be visible to student even if the rubric is hidden from the students and they don’t click on the rubric button.
- Click Submit to submit the score, and all the feedback.
Using the Rubric in Window to Grade
To release the feedback and marks to the students you have to unhide the column in grade center.
- To hide or unhide a Grade Centre column first you need to go to the module in blackboard and then click on the Grade Center tab in the left menu of the module. You then need to click on “Full Grade Centre” to open Grade Centre.
- Find the column you want to hide or unhide and click on the grey drop down arrow.
- A blue drop down menu will appear. Click on “Hide from students (on/off)” to toggle between on and off.
- When to column is hidden from students you will see an icon of a circle with a red diagonal line through it in the column heading.
If this icon is not there the column is visible to students
The rubric tool allows instructors to mark and grade papers online in a paperless environment. Instructors are able to marks with rubrics that feature quick scoring of student papers against a list of scaled criteria created by the instructor or educational institution.
Students are able to access the marked version of the paper and view any grades, comments, or requested changes noted by the instructor.
Viewing Marked Papers
To view a marked paper, the student user will first need to go to the submission point used to submit the paper When they click on the paper they will see comment & markup list.
Note: If the comment & markup list is not visible then assignment has either not been marked yet or the results have not yet been released. Contact the tutor for further information.
This is a list of all the comment added to the paper. You can click on these comment to take you to the point in the paper where they were placed.
You will also see the grade section.
Note: These grades are provisional and subject to change during the moderation process.
The grade section contain the grade, a link to the original document, student’s comments and the none-rubric feedback from the lecturer. This also contain the view rubric button.
When you click the rubric button it open the rubric details complete with all rubric feedback
| Blackboard Rubrics | Turnitin Rubrics | |
|---|---|---|
| Criteria descriptions | No | Yes |
| Scale Ranges | Yes | No |
| Point Ranges | Yes | No |
| Grading forms | Indirectly with 1 column | Yes |
| Rubrics belong to | The Module | The User |
| Hide rubric scoring | Yes | No |
| Import from excel | No | Yes |
| Link comments to rubric criterion | No | Yes |
| Add text feedback for each criterion | Yes | Only with grading forms |
Recording of training sessions
DELTA Staff Development Training room / Blackboard Rubrics 22/01/21