
What is Calendly?
Calendly helps you schedule meetings without the back-and-forth emails.
It effectively creates a web page where people can choose a time and duration to schedule an appointment with you. This is then automatically placed in your outlook calendar.
The types and times of the appointments available for people to schedule can be set via your dashboard.
Why use Calendly?
The advantage of Calendly is that you can specify times that you are free for meetings. It also removes the need for people to contact you asking for an appointment, they can just select an appropriate time and duration.
This can be especially useful for people with busy agendas, and academic staff who need to protect a portion of their time. It is akin to academic office hours.
Getting Started

Getting Started for Google & Office 365

Calendly Getting Started video 2.2
If you prefer text based instructions please click to expand the information below:
There are three main steps to setting up your account:
- Configure your event types (the types of meetings, appointments, etc. people schedule with you) and availability
- Customize your Calendly page (the page invitees visit to schedule with you)
- Share your Calendly link with others (it looks something like calendly.com/[your-name-here])
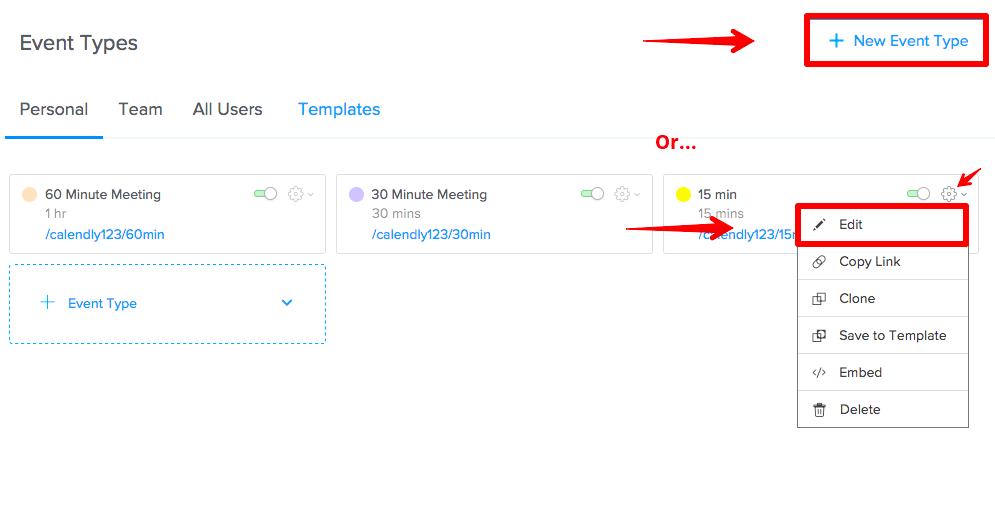
Configure your event types:
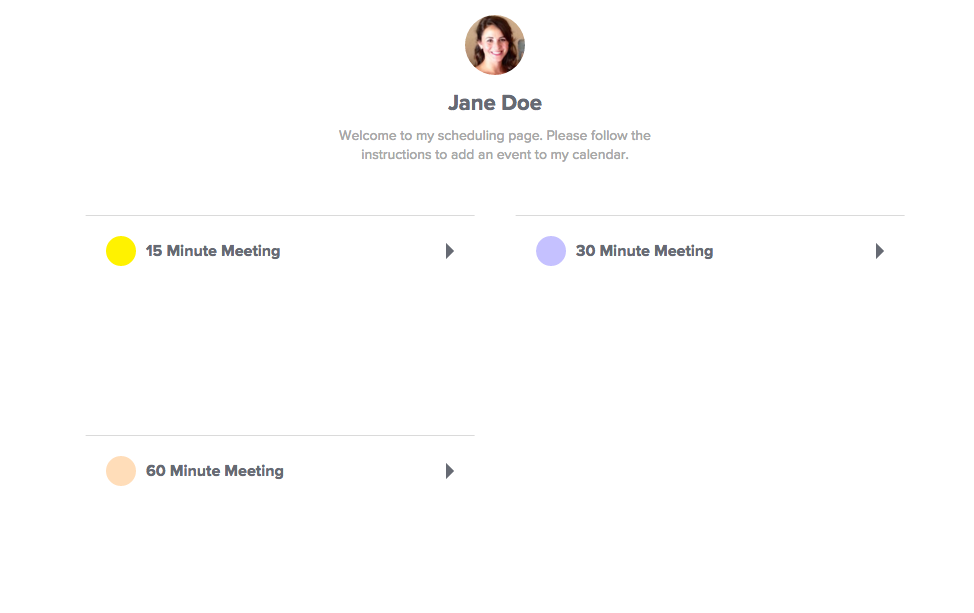
To minimize setup, we’ve created 15, 30 and 60 minute event types for you so that by default, your Calendly page looks like this:
Visit your Event Types page to customize these default event types, or to create new ones from scratch.
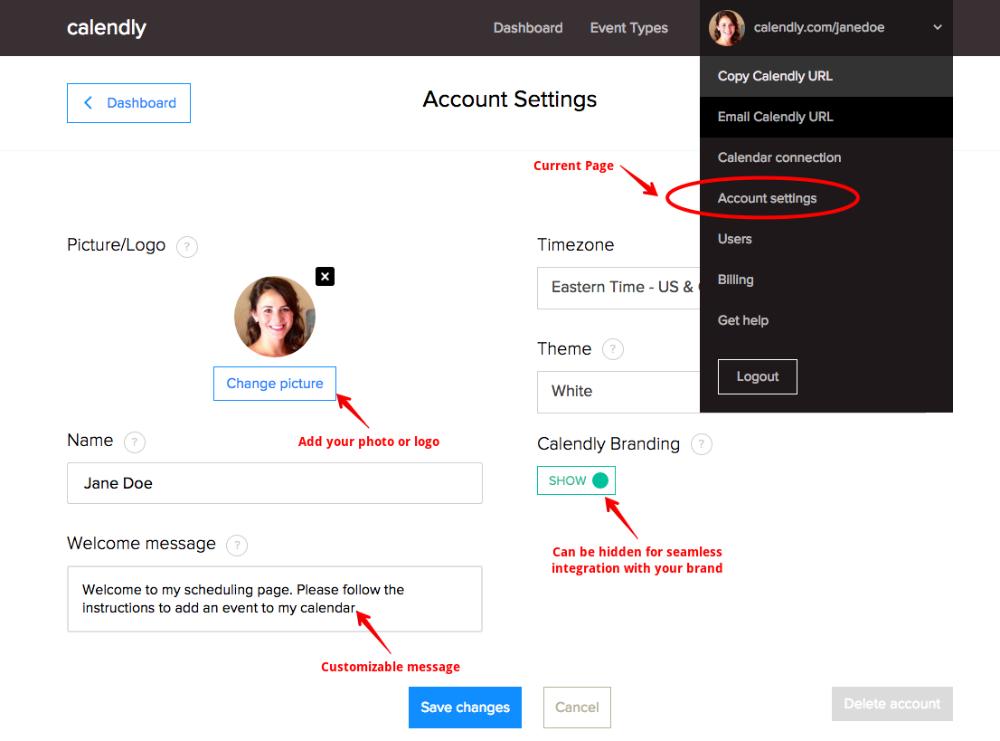
Customize your Calendly page:
Add your headshot or logo and personalize your welcome message from Account Settings:
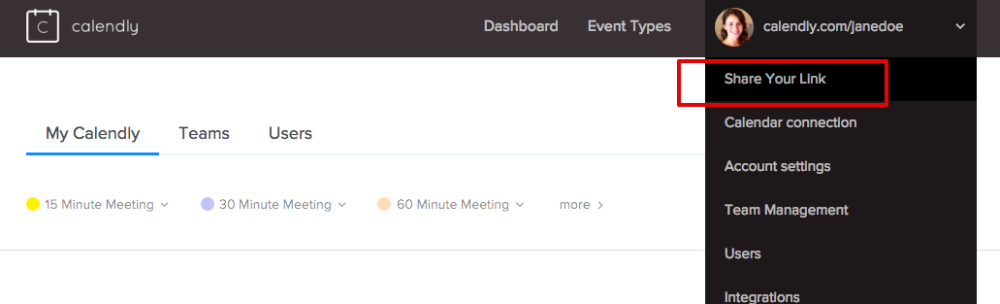
Share your Calendly link:
Add your link to your workflow to simplify scheduling! Include it in your email signature, embed Calendly on your site, or share it anywhere else others typically need to schedule with you. For inspiration, see how fellow Calendly users share their links.
You can embed a web link so that it appears as a standalone piece of content alongside other materials. For example, you can add a link to a website that has the required reading you list in the syllabus.
- In a content area, learning module, lesson plan, or folder, select Build Content to access the menu and select Web Link.
- Type a name and paste or type the URL. Use the http:// protocol, such as http://www.myinstitution.edu/.
- Type an optional description. You can use the functions in the editor to embed content in your text and add formatting. You have creative control over how your content appears and the flexibility to change the order and appearance when you want.
- Select Browse My Computer to upload a file from your computer. The file is saved in the top-level folder in your course’s file repository: Course Files or the Content Collection. You can also attach a file from the repository.-OR-Drag files from your computer to the “hot spot” in the Attach Files area. If your browser allows, you can also drag a folder of files. The files may upload individually. If the browser doesn’t allow you to submit the web link after you upload a folder, select Do not attach in the folder’s row to remove it. You can drag the files individually and submit again.
You won’t be able to drag files to upload if your institution uses an older version of Blackboard Learn.
You can use the file name or provide another name for the file.
- Select the appropriate options for availability, tracking, and display dates. Display dates don’t affect a web link’s availability, only when it appears.
- After you submit, the web link appears in the content list. You can change the content at any time. Access the web link’s menu and select Edit.
You can change where the item appears in the list with the drag-and-drop function or the keyboard accessible reordering tool.