To start a recording open the session menu  and click on the Start recording button.
While you are recording the session menu tab also shows a recording camera with a red dot.
To finish recording open the session menu and click on the stop recording button.
It may take several hours for recording to be processed and appear in the recordings list in your module.
Note: if you start breakout groups the recording will stop and you will have start a new recording when you end the breakout groups. Breakout rooms can’t be recorded.
Note: You can’t access recordings from the Blackboard student mobile app.
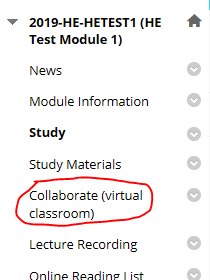
Goto the collaborate ultra page
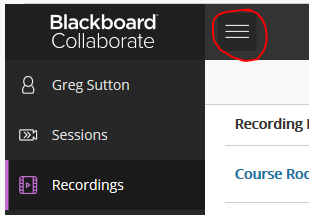
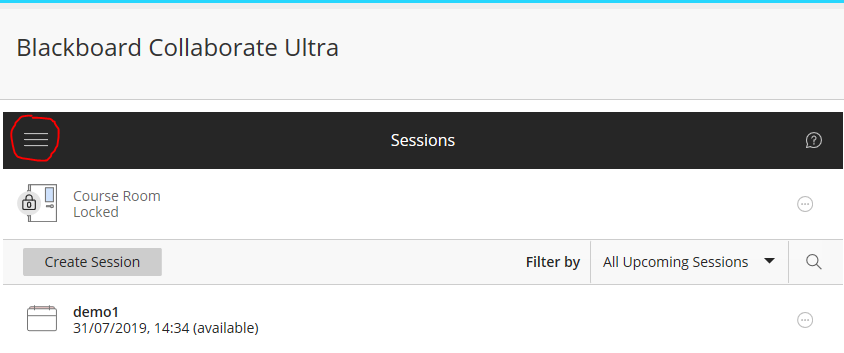
Click on the burger menu button  top left and a menu will appear.
Click on recording to see the list of recording of recent recordings for that module.
If the recording is older than 30 days you have to search for it by date. You can filter the recording by a date by clicking on the dropdown arrow next to recent recording, choosing Recording in a range and entering dates.

When you find the recotdinf you can:
- Watch the recording
- Download the recording
- Edit the recording setting (change it’s name and make it public)
- copy a link to the recording (the link will only work if you have made in publin in the recording setting)
- Add captions to the recording
- Delete the recording.
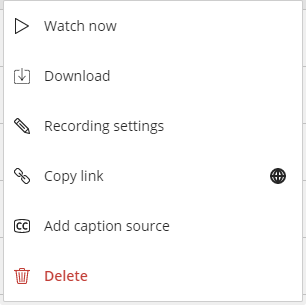
Note: Student will only be able to watch and download the recording.
Note: you will not be able to recover a deleted recording.
If you haven’t given student access to the Blackboard Collaborate ultra page, you will need to create individual links for each recording. Go to the Recording page using the Sharing a Collaborate Recording instructions below.

Then click on the burger menu.
Then click on Recordings
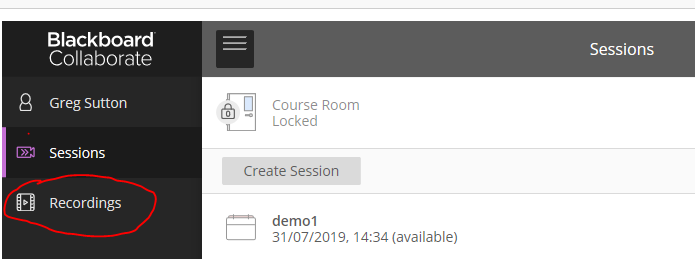
You will then see a list of recordings from the last 30 days. For older recording click on the Recent Recordings drop down box and choose Recordings in a Range.

You can then pick a date range to look for your recording
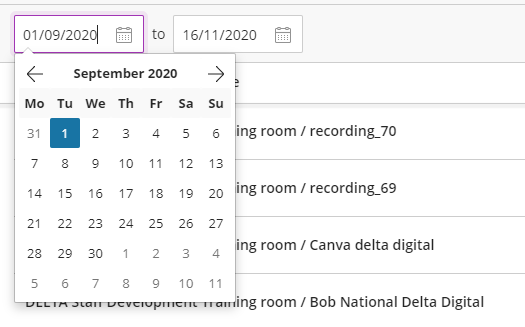
If you start the date range from the 1st of September, you will see all the recordings from that date on (academic year).
When you have found your recording click on the three dots to access the options.
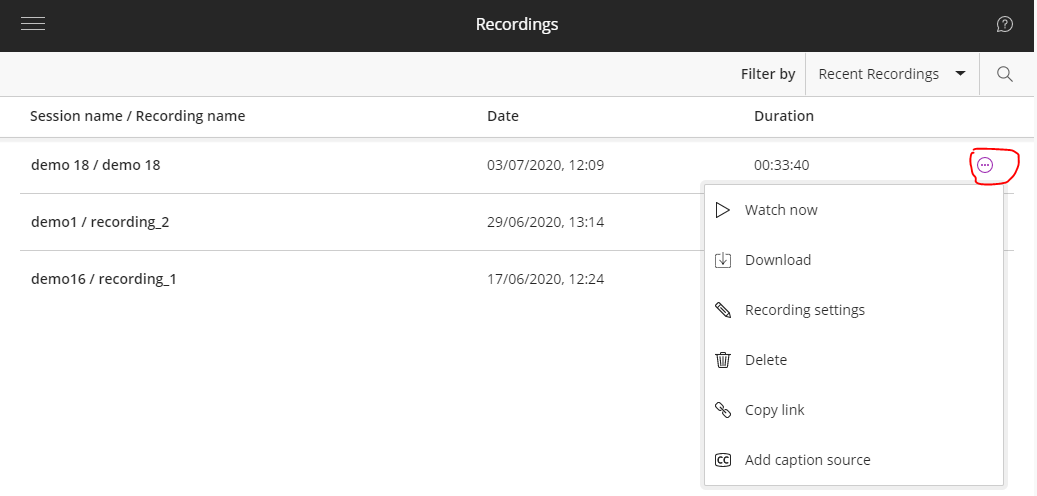
You only get the ‘download’ option if you are a tutor or if the download recordings option is enabled in the room settings of the room that the recording was made in.
To share the web links to the recording with people not attached to the module, (after the 16th of July 2020,) you will have to turn on the option to allow public access to the recording. Recordings made before this date will have the option turned on by default. To enable it, click on recording setting and check “Allow public access” then save the setting.
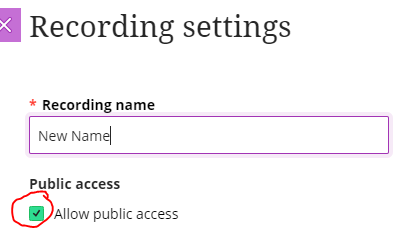
Students who have access to the module and Collaborate will be able to access the recording regardless of the public access setting.
To get the link to the recording click on Copy Link button to add the URL to the clip board

The planet icon on the button indicates that the link is public.
when you click the button, The button will change to show the text of the URL text. If your browser doesn’t support the copy link button you can copy the link URL manually from the text box.

You can then paste the link URL into the location where you want to make the recording available form. For example, you may wish to share the recording in the same folder as the study materials for the session.
Uploading your video to Panopto first is recommended, see instructions below, as it will provide the students with accessible features that Collaborate do not currently offer, for example, caption.
Once you have a link to a recording as described above you can add the link to Study Materials or any other content area in blackboard
Note: don’t paste the link into a browser to see if it works then copy the link from the browser. The URL changes once you paste it into a browser.
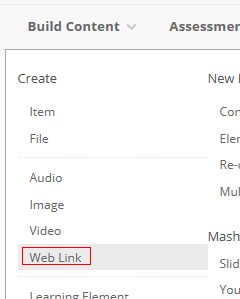
Go to the content area where you want to add the link, hover over build content and click on add web link.
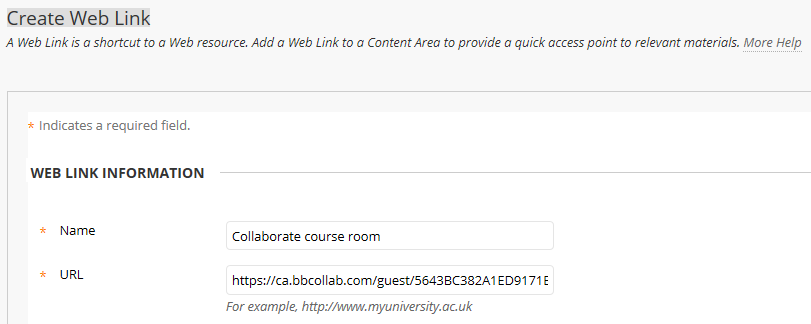
Enter a name for the web link usually the recording name.
Paste the link into the URL box.
You can add a description if you like and set the usual Blackboard item options.
Then click Submit.
The link to your Collaborate Recording will appear at the bottom of the content area.

When sharing content with an external user you have to take into account security GPDR requirement.
If you are sharing student presentations or classroom recording there may be personal content in there that should not be shared more widely.
If you plan to publish a recording to the web you may all so be required to make the text chat anonymous (this has to be set in the room setting before the recording was made.) you may also need to edit bit out before publishing. (to do this you will need to move the recording to Panopto)
Uploading your video to Panopto is recommended as it will provide the students with accessible features that Collaborate do not currently offer, for example caption.
https://derby.cloud.panopto.eu/Panopto/Pages/Viewer.aspx?id=8d926277-e376-4c9d-9875-acc60099df5e


