
There are two options for surveys at Derby. MS Forms is the recommended option for nearly all uses.
MS Forms
We recommend MS Forms as the easiest option for collecting survey data. This is part of Office 365 and available to anyone at the University. MS Forms help page is here.
Quizzes with MS Forms
You can also create quizzes with MS Forms.
Limesurvey
Limesurvey is regularly audited and data is deleted. You must ensure that you keep your data outside of Limesurvey to prevent your data from being deleted during an audit.
Students must get permission from their supervisor for an account. If your survey uses only simple questions like choice or short or long answer then use MS Forms.
For a Limesurvey account, you need to get your tutor’s permission. Students use this form to request access.
Staff should also consider using MS Forms for simple surveys. For more complex survey types, please apply for an account.
The University requires staff and students that want to use this service to store their survey data after completion of the project in a secure and sustainable manner. You will be expected to comply with the University’s data protection and GDPR policies
SAMPLE PRIVACY NOTICE
The information that you supply on this xxx form will be held and processed in line with the Data Protection Act 1998 and GDPR.
We use this information to xxxx
We share this data with xxx, it will not be used for any other purpose
We may contact you for xxx
We retain this data for a period of xx years/your time as an employee; after that time it is deleted securely
I give my explicit consent for my details to be used in this manner: Yes No
As a data subject you can withdraw that consent at any time by contacting gdpr@derby.ac.uk
Our Data Protection Officer (DPO) is Helen Selby on (01332) 591954. Alternatively you can email gdpr@derby.ac.uk
Further information on how we handle your information and details of our DPO can be found here on our website https://www.derby.ac.uk/its/datagov/privnotice/
================================================
What is LimeSurvey?
Lime Survey is a survey tool hosted internally at the University.
Why would I use LimeSurvey?
Compared with other tools like Course Resources or Microsoft Forms, Lime Survey has a larger set of question types, a powerful branching feature and a robust survey manager which contains comprehensive survey statistics.
Lime Survey can be used for a variety of purposes in teaching, learning and also for research.
For further information click to expand the links below:
You need to get an account on Lime Survey to start.
- Visit the URL: https://survey.derby.ac.uk/admin and you will be prompted to login to your LimeSurvey account.
- Login using your credentials, following steps A-E.
- A. Authentication method – If your username is the same as other UoD services then set this to “LDAP”.
B. Username – Your account username.
C. Password – Your account password.
D. Language – Optional, default is English.
E. Log in button – Click to login. 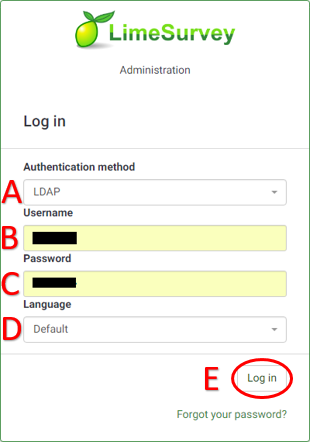
Creating a New Survey
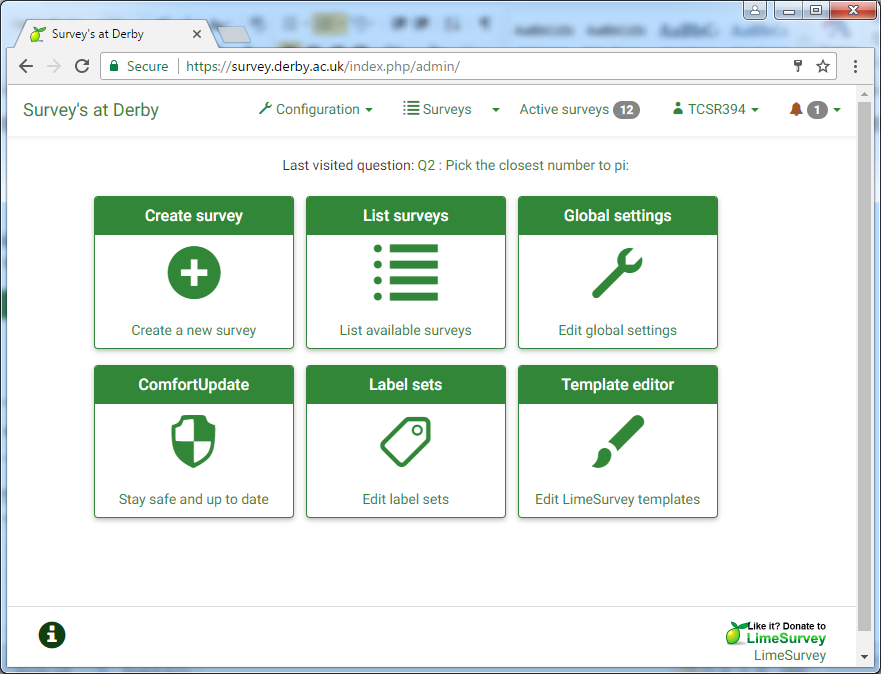
- Upon logging in, you will be presented with your LimeSurvey home page with some green buttons. Click the ‘Create survey’ option.
- You will then be brought to the survey creation page. Fill out the details to your own specification.
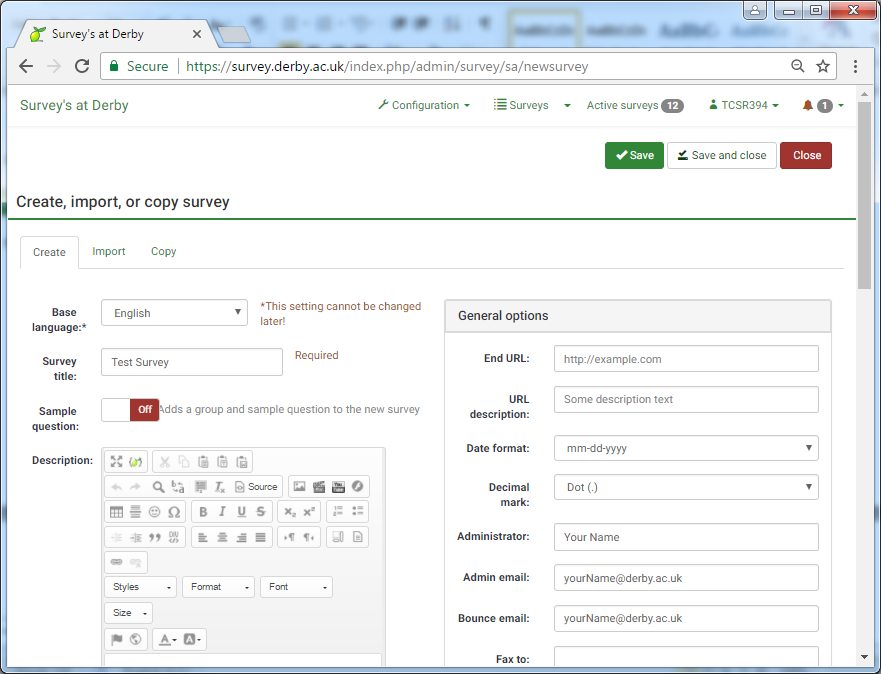
- Once you have filled out the page, click ‘Save and close’ in the top right corner of the page.

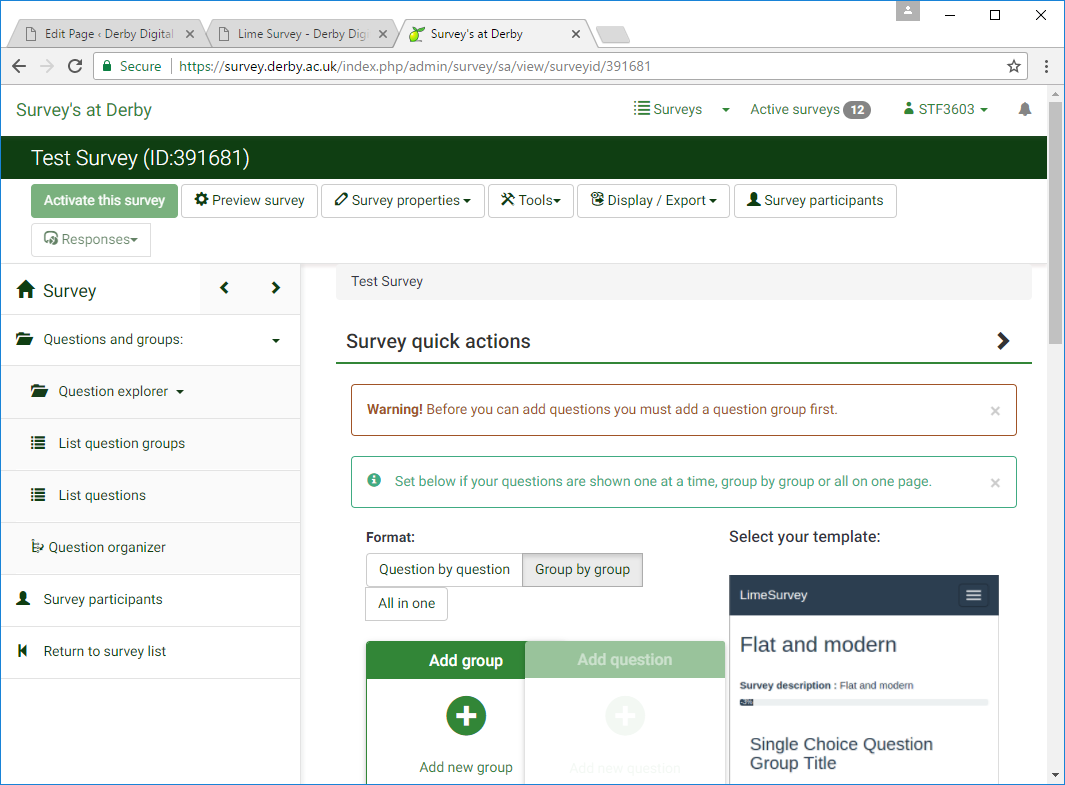
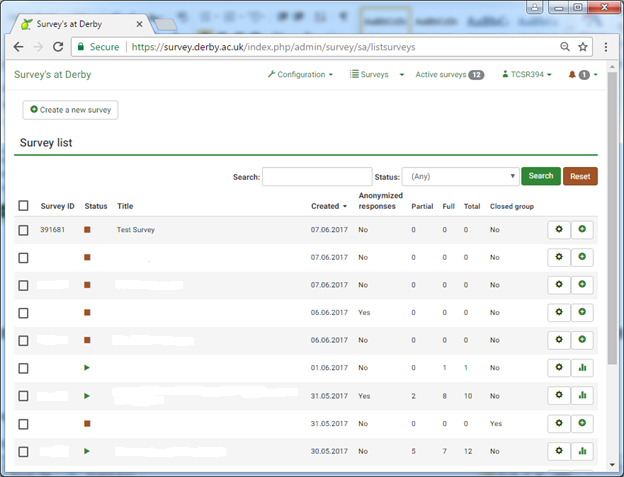
- You will then be on your survey’s main page. This screen is the home page for your survey; all the settings of your survey can be accessed from here.
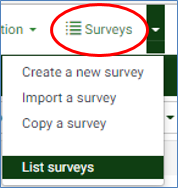
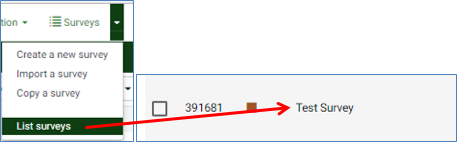
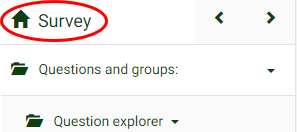
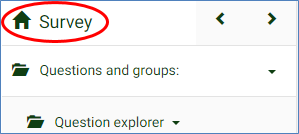
- If you need to find your survey again, or switch to another survey, you can do so by clicking Surveys at the top. That will bring you to your list of surveys.
In order to create survey questions, you must create Question Groups, which you then add your individual questions for.
Adding a Question Group
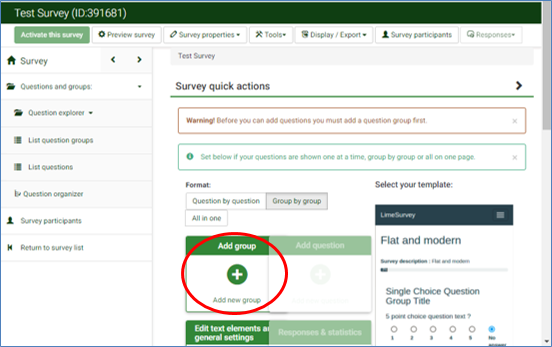
- From your home survey page, click the green Add group button as shown in the image below.
- Fill out the details for your question group. You will find two textboxes for ‘Randomization group’ and ‘Relevance equation’, don’t worry about these for now and leave them blank. In this example I am going to call my question group “Personal Details”.
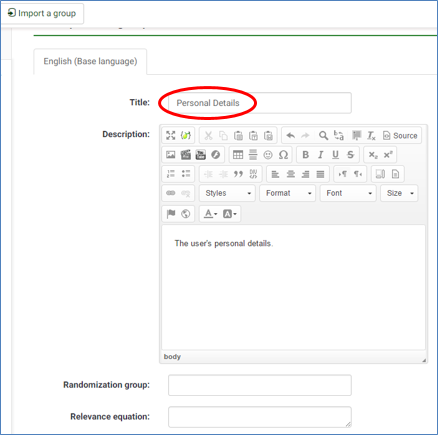
- Click ‘Save and close’ in the top right corner of the screen.
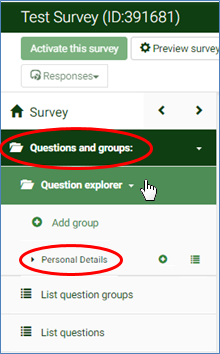
- You have successfully created a question group; you will be brought back to your survey’s home page. You can view your question group by navigating through the ‘Questions and groups’ and ‘Question explorer’ folders on the left side of the screen.
Adding a Question to your Group
- If you aren’t there already, navigate to the home page of your survey by clicking ‘Surveys’ at the top, and selecting your survey from the list.
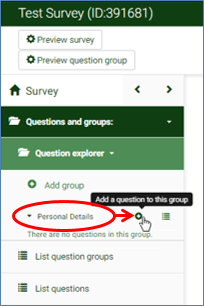
- From the Question explorer on the left side of your screen, find your question group. To the right of your chosen question group, click the green plus button that says ‘Add a question to this group’.
- You will be greeted by a page with some settings to customize your question. Your Code should be unique for every question, for example: Q1, Q2, Q3, etc. Fill out your Question and the Help section. You may also wish to consider taking a look at the General options and Advanced settings and consider making the question mandatory or not.
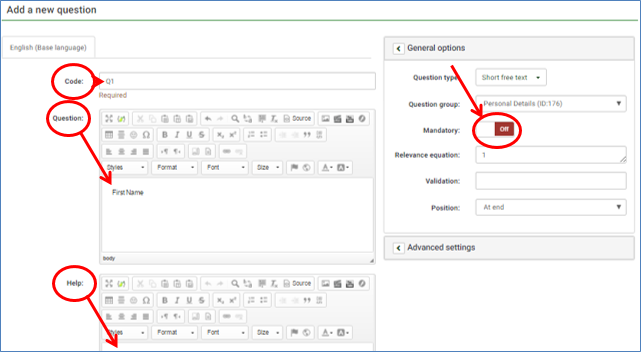
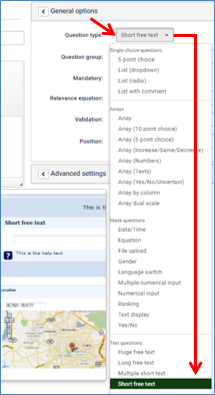
- Under ‘General options’, click the drop down menu for ‘Question type’. It will show a long list of question types for you to choose from. In this example the question is ‘First Name’, so I have chosen ‘Short free text’ which will give the user a short textbox for them to answer the question.
- Click ‘Save and close’ in the top right corner of the screen.

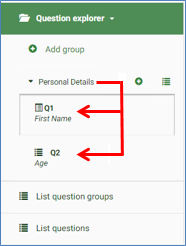
- You will be brought back to the survey’s home page. On the left you can now see all your question(s) within you group(s).
Answer options
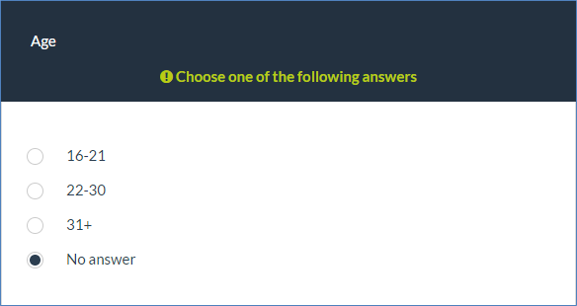
- Some questions require answer options, for example: Multiple choice or List (radio):
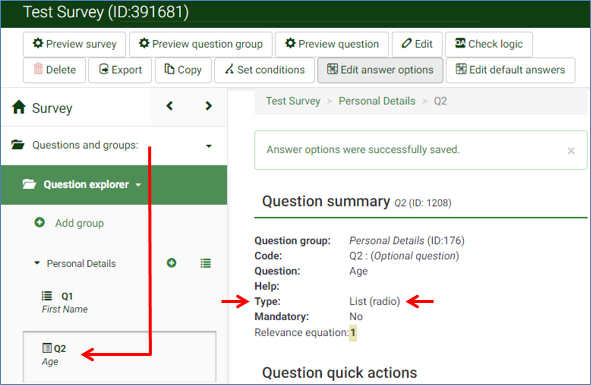
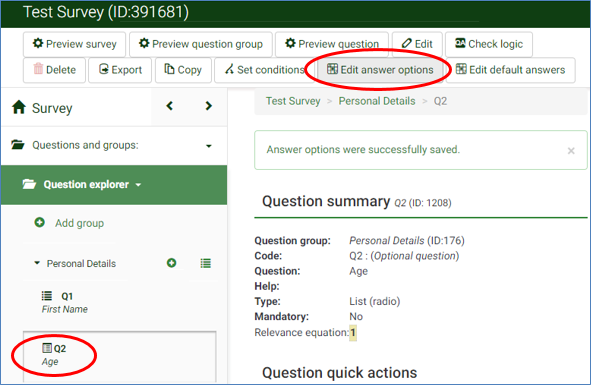
- From your survey’s home page, on the left side of the page expand ‘Question explorer’ and click on the question you wish to add answer options for. In this instance, I have created a question called Age which I have as type ‘List (radio)’.
- Once you have clicked on your desired question, click the ‘Edit answer options’ button at the top of the page.
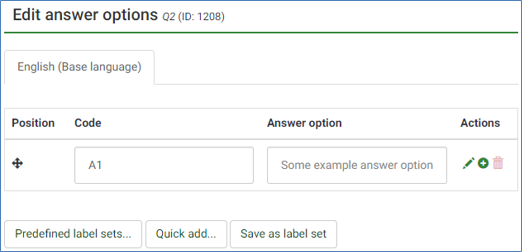
- You will be brought to a screen where you can add your own answer options.
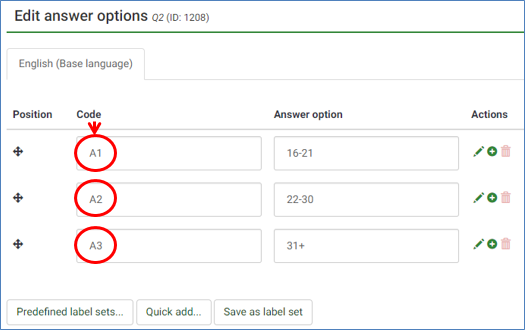
- To add or delete an answer option, click the green plus button or the red recycle bin on the right of the corresponding answer option. Also, go ahead and fill out your answer options.

- Be sure to keep your Codes unique for every answer option. For example, A1, A2, A3, etc.
- Click the ‘Save and close’ button in the top right corner of the page.

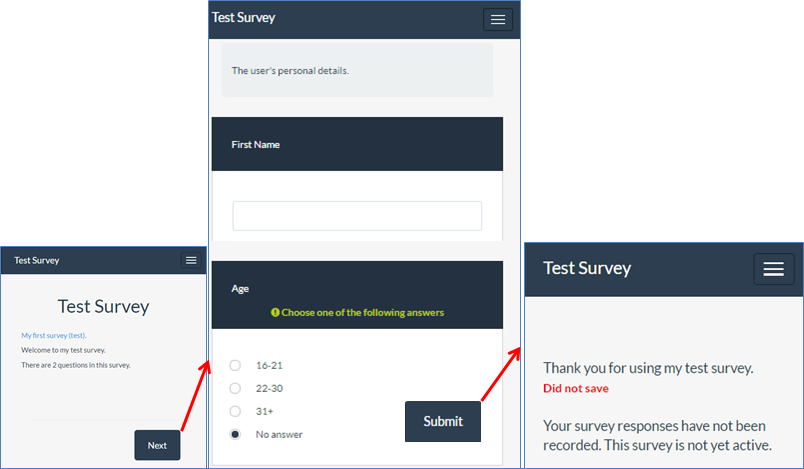
- Now you have built your survey, it is time to test it. Navigate to the Survey home page by clicking the Home button in the top left corner of the screen.

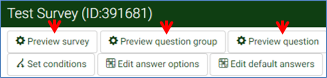
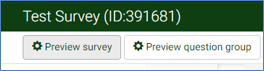
- From your survey home page, click one of the three preview buttons at the top of the screen.
- Run through your survey and check to see that everything is as it should be.
Assessment Options are the ability to set assessment values for each question. With the user’s answers and final ‘assessment score’, we can display a custom assessment message at the end of the survey. This is particularly useful for quizzes, exams and questionnaires, as it can be used as an automatic marking tool to grade participant’s answers.
Turning Assessment Mode ON
- Navigate to the Survey home page by clicking the Home button in the top left corner of the screen.
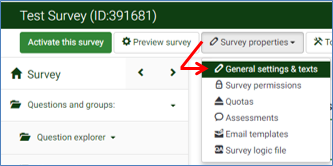
- From the survey home page, click the ‘Survey properties’ button at the top of the screen, and click the ‘General settings & texts’ option from the drop-down list.
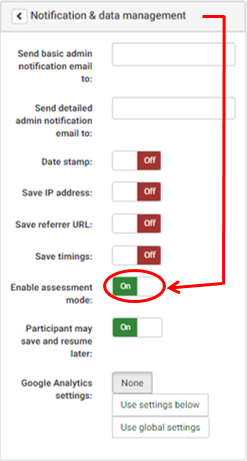
- You will then be brought to the survey’s general settings page. On the right side of the screen, click the ‘Notification & data management’ category to expand it and reveal its options. Click the ‘Enable assessment mode’ option to toggle it ON.
Setting assessment values for questions
- Add or edit a question that you would like to have an assessment value. For example, I added a new question called: “How are you feeling?”, and set the question type to List (radio). On the survey’s home page, select the question on the left side of the screen via the question explorer.

- Click the ‘Edit answer options’ button at the top of screen.

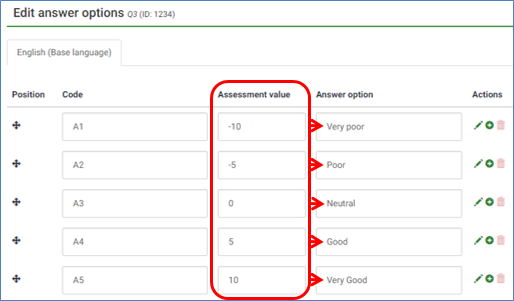
- You will then be brought to a screen where you can insert your answers for the question, along with Assessment values for every answer. In this example, there are 5 answers each with their own assessment value.
- Click the ‘Save and close’ button at the top of the screen.

Assessment Rules
- Navigate to the Survey home page by clicking the Home button in the top left corner of the screen.

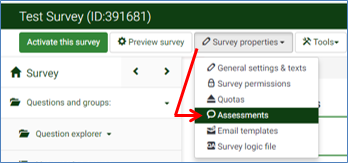
- From the survey home page, click the ‘Survey properties’ button at the top of the screen, and pick the ‘Assessments’ option from the drop-down list.
- You will then be brought to a screen where you can add Assessment rules.
A. Scope – Total survey, or just specific for one group.
B. Question group – A specific question group.
C. Minimum – Minimum assessment value.
D. Maximum – Maximum assessment value.
E. Heading – Title for the assessment message (displayed to the user).
F. Message – Message for the assessment (displayed to the user).
The below example shows an added assessment rule where: If the user’s assessment score is between 7-10; display the message shown in points E and F (heading and message).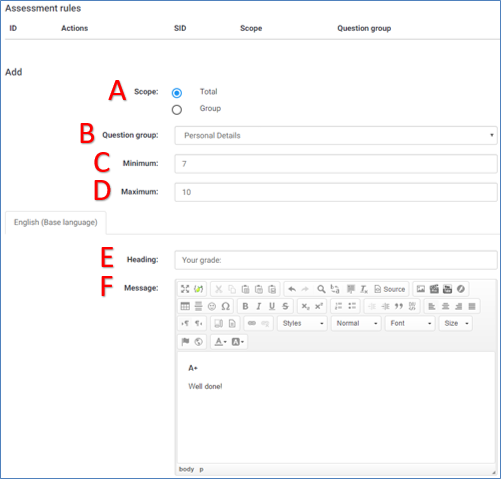
8. If you wish to display the user’s assessment score; you can do so in the message. By writing “{ASSESSMENT_CURRENT_TOTAL}” (without quotations), which is a placeholder code. A full list of these codes can be found on LimeSurvey’s website under the Expression Manager.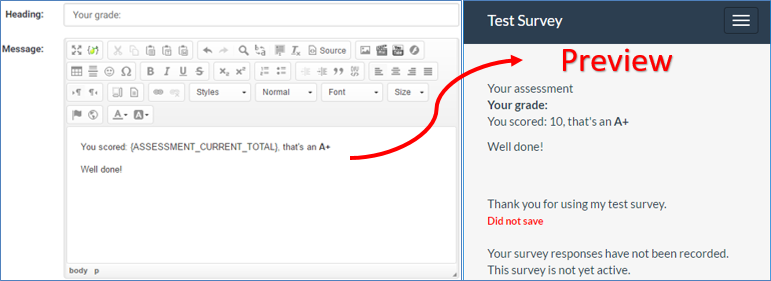
9. Click the ‘Save’ button in the top right corner of the screen.![]()
10. There will now be a visible list of assessment rules which you can edit or delete on the left of every assessment rule.
11. When finished, click the ‘Save and close’ or ‘Close’ button in the top right corner of the screen.![]()
Question Organizer
- Navigate to the Survey home page by clicking the Home button in the top left corner of the screen.

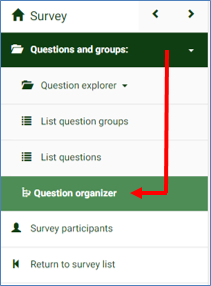
- On the left side of the screen, click the ‘Question organizer’ button from the menu.
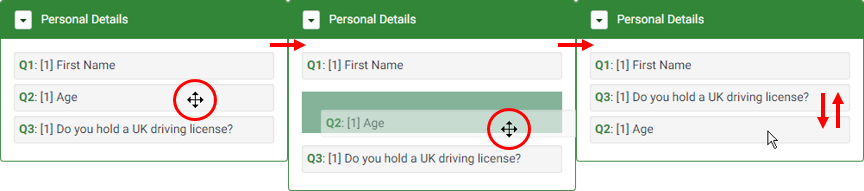
- From this screen, simply click and hold a question to drag it over another question to switch the order. For example: Switching Q2 with Q3.
Show & hide relevant questions
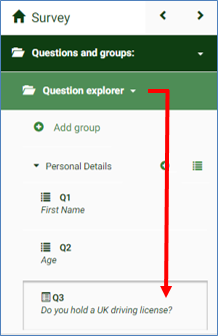
- From the survey home page, select the question you want to control via the Question explorer on the left side of the screen. For this example; I only want Q3 to be shown, based on the result of Q2.
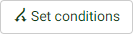
- With the question selected, click the ‘Set conditions’ button along the top of the screen.
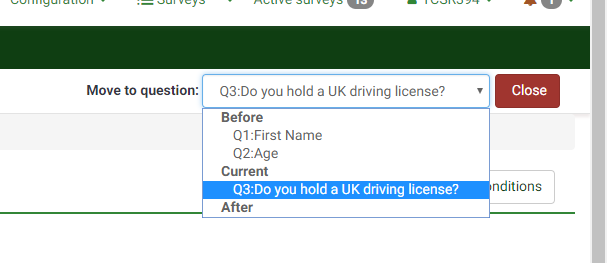
- You will then be greeted with the Conditions designer page. In case the wrong question is selected, you can click the ‘Move to question’ list in the top right corner of the screen and select your question.
- To set a condition for the current question, select the options in order from A to D as shown in this example:
A. Question – The question that will have an impact on our current question.
B. Comparison operator – Method of comparison that will be used to show the current question.
C. Answer – Which answer to compare against.
D. Add condition – Press the Add condition button to save the condition setting, or Clear to delete the condition setting.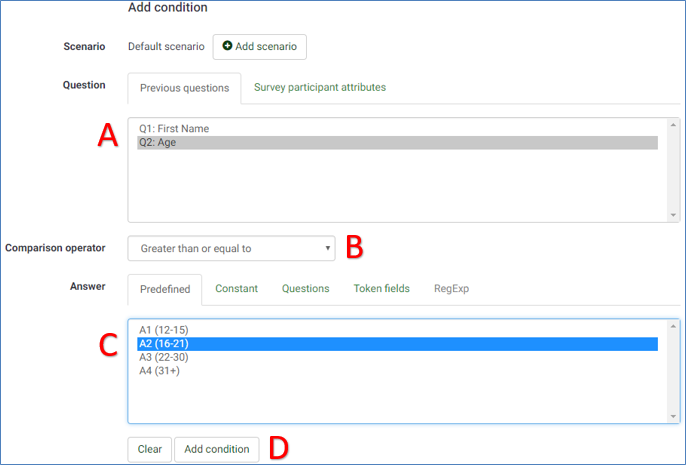
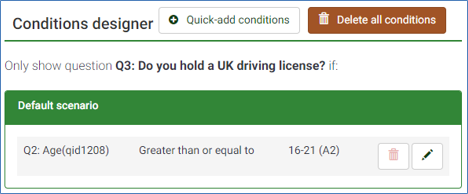
- Once the condition has been added, it will appear at the top of the page as a Default scenario.
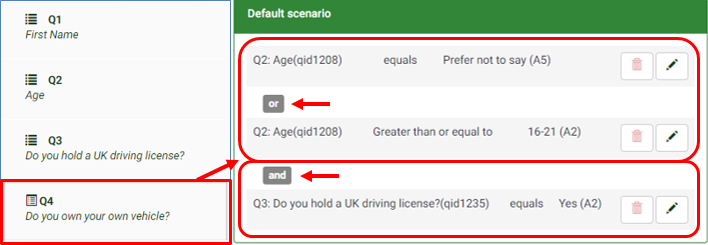
- It is possible to add multiple conditions to show one question. For example, Q4 only shows based on the following specific answers of Q2 and Q3:
- Press the ‘Close’ button in the top right corner of the screen.

- Preview your survey in the top left corner of the screen to test the newly added conditions work correctly as intended.
- Navigate your way to your survey’s home page by clicking the Home button in the top left corner of the screen.
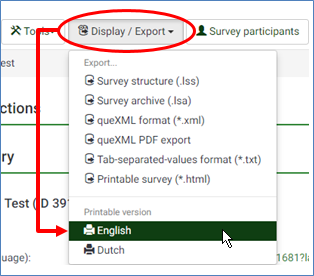
- Click the ‘Display / Export’ button along the top of the page, and select one of the Printable versions from the drop-down list (e.g. English).
- A new webpage will open showing your survey. Right click in an empty area and select the Print option (keyboard shortcut CTRL + P).
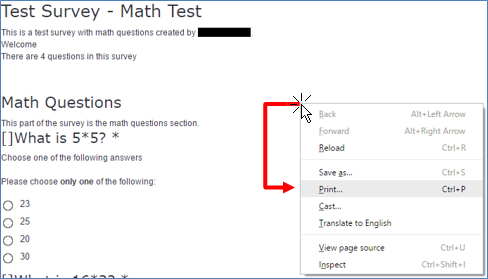
- Preview the printed version of your survey, choose your print settings and click the print button.
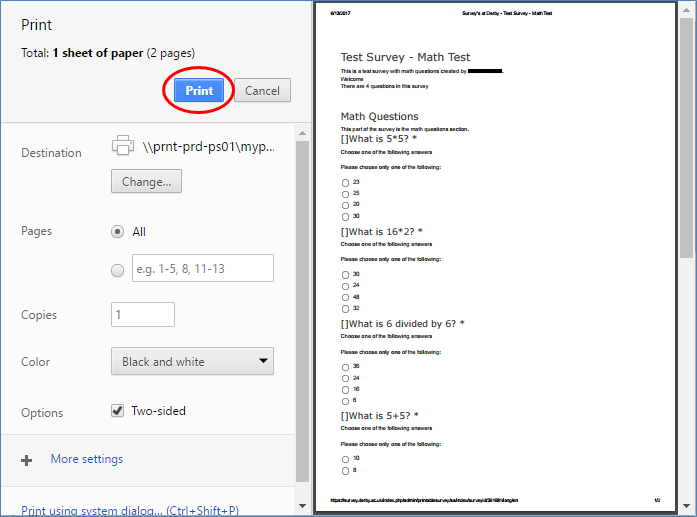
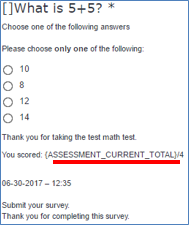
- Note: When printing your survey, bear in mind that you cannot use placeholder codes such as “{ASSESSMENT_CURRENT_TOTAL}” in your survey’s welcome or end message, or it will be incorrectly displayed on your printed survey as shown in this image:
If you wish to distribute your survey online, you need to send a link of your survey to each of your participants. LimeSurvey makes this easy by allowing the creator to construct a list of participants, and send an email to all of these participants. When you are satisfied with your survey, it is then time to add your participants to your survey.
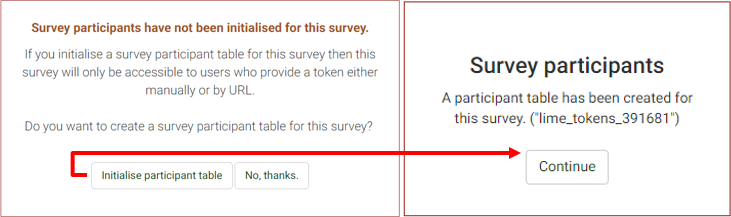
Creating a survey participants table
- From your survey home page, click the ‘Survey participants’ button at the top of the screen.

- Click the ‘Initialise participant table’ button and ‘Continue’.
Adding participants
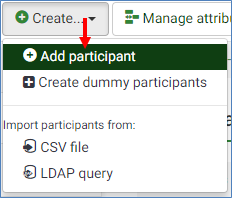
- You will then be brought to the Survey participants page. Click the ‘Create’ button at the top of the screen, and choose ‘Add participant’ from the drop-down list.
- You will be brought to a screen where you can fill out a single participant’s details.
A. Completed? – If the participant has completed the survey (default NO).
B. Participant’s First name.
C. Participant’s Last name.
D. Participant’s Token – Leave this blank, it will be automatically generated later.
E. Participant’s Language – Depends on base language and additional languages of the survey.
F. Participant’s Email address.
G. Participant’s Email status, leave this as “OK”.
H. Invitation sent? – If the participant has been sent an email invitation already (default NO).
I. Reminder sent? – If the participant has been sent a reminder already (default NO).
J. Uses left – How many uses or attempts the participant has left on the survey (default 1).
K. Valid from – Start valid date and time of survey.
L. Until – Expiry date and time of survey.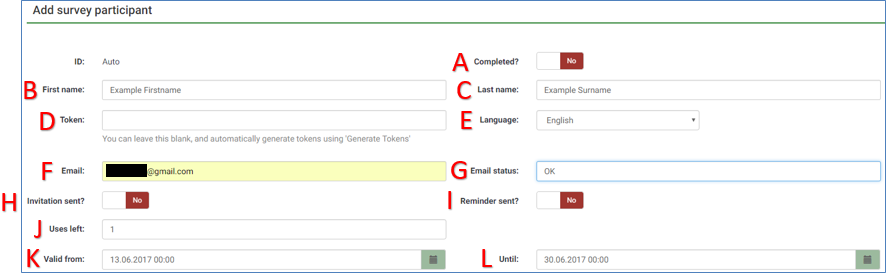
- Click ‘Save’ in the top right corner of the page.
- You will then be shown two options.
A. Browse survey participants – When you’re happy with your participants, choose this option to view the list of all participants.
B. Add another participant – As shown in steps 4 and 5.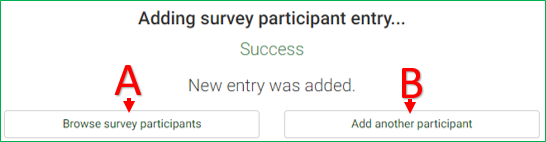
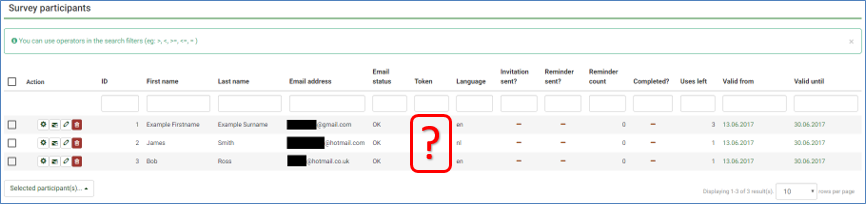
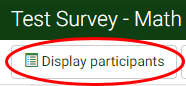
- In the Survey participants screen, you can also view the list of participants by clicking the ‘Display participants’ button in the top left corner of the screen.

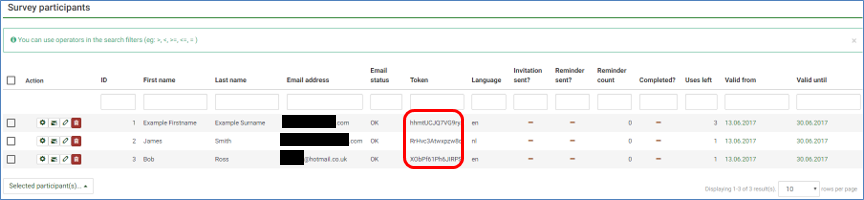
- This is the list of participants for your survey. You may notice that there is no data for the tokens.
- Once you have created all your participants, click the ‘Generate tokens’ button at the top of the screen.

- Click Yes to create tokens for all your participants, and click OK.

- Navigating back to Display participants, you should now be able to see a token for each of your participants. A token is an ID for each participant to ensure that their survey is unique for them.
Activating the Survey
You should only activate your survey if you are absolutely certain that you survey is setup and will not need changing. When the survey is active it cannot be changed. However, you can just as easily deactivate the survey at any time too.
- Navigate to the home page of your survey by clicking the Home button in the top left of any screen.
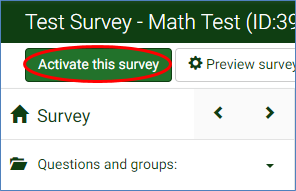
- In the top left corner of the page, click the green button that says ‘Activate this survey’.
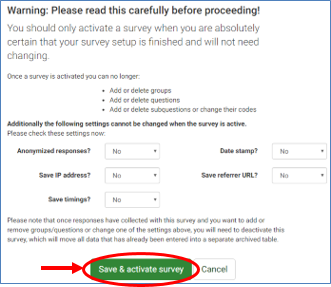
- Read the next screen carefully before proceeding. Choose the settings you wish and click the ‘Save & activate survey’ button.
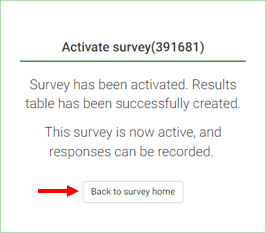
- You will get a confirmation if the survey has been successfully activated. Click the ‘Back to survey home’ button.
Stopping the Survey
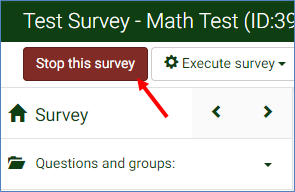
- In the same place as where you activated the survey (survey home page), you can click the red ‘Stop this survey’ button in the top left corner of the screen to stop the survey.
- You will be brought to a screen with two choices, you can read the bullet points for both options in the below screenshot:
A. Expire the survey.
B. Deactivate the survey.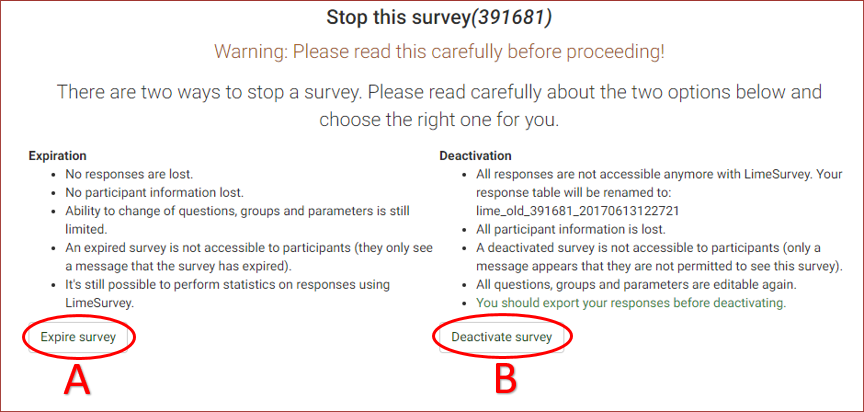
Emailing Participants
In order to email the participants of your survey, the survey must be live and activated. So make sure that your survey is fully setup before thinking about emailing the participants your survey. Unless you intend to activate the survey, email participants as a test and deactivate the survey again afterwards.
- From your survey’s home page, navigate to the Survey participants page by clicking ‘Survey Participants’ button at the top of the screen.
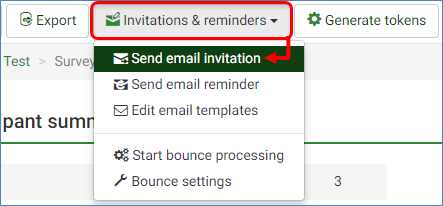
- On the Survey participants page, click the ‘Invitations & reminders’ button at the top, and choose ‘Send email invitation’ from the drop-down list.
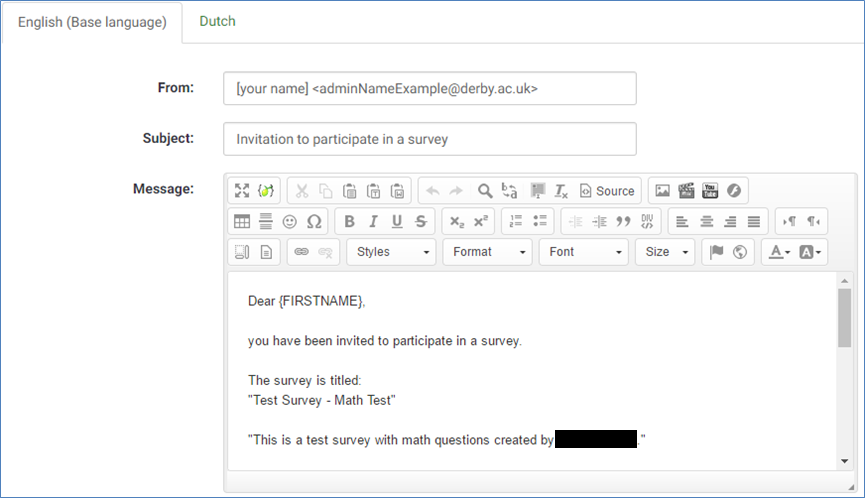
- You will be brought to a page to write an email to all your participants. The From, Subject and Message fields will already be filled out. Feel free to customize the email, and click the ‘Send invitations’ button at the bottom of the page.
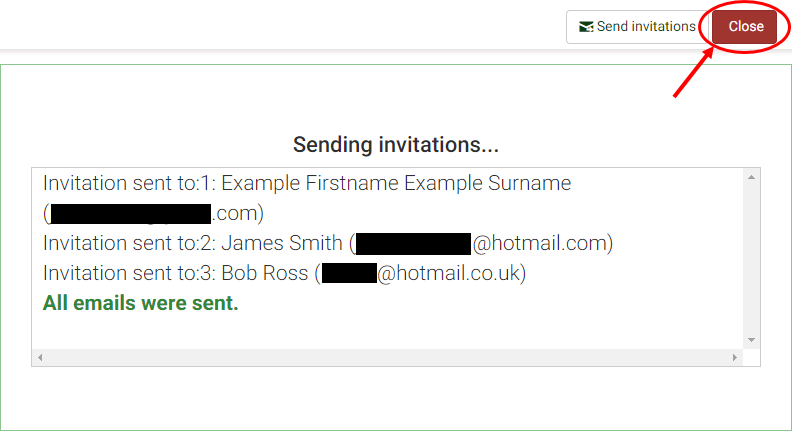
- You will be shown a confirmation screen of all the names and email addresses of your participants. Click the ‘Close’ button in the top right corner of the screen to return back to the Survey participants page.
Reminding Participants
Sending a reminder to your participants is very similar to emailing participants. The survey must be activated and your participants must have already been sent an email invitation in order to send a reminder to your participants.
- From your survey’s home page, navigate to the Survey participants page by clicking ‘Survey Participants’ button at the top of the screen.
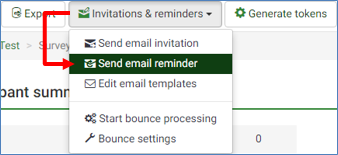
- On the Survey participants page, click the ‘Invitations & reminders’ button at the top, and choose ‘Send email reminder’ from the drop-down list.
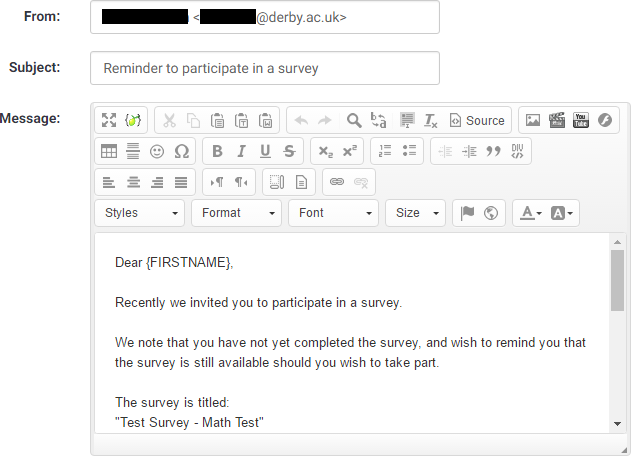
- You will be brought to a page to write a reminder to all your participants. The From, Subject and Message fields will already be filled out. Feel free to customize the reminder, and click the ‘Send reminders’ button at the bottom of the page.

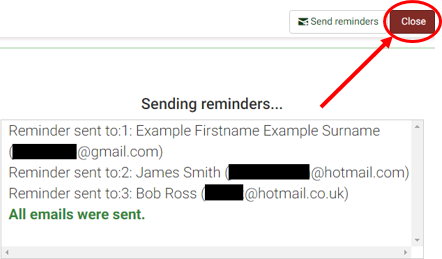
- You will be shown a confirmation screen of all the names and email addresses of your participants. Click the ‘Close’ button in the top right corner of the screen to return back to the Survey participants page.
View Responses and Statistics
- Navigate to the survey’s home page by clicking the home button in the top left corner of any page on the website.
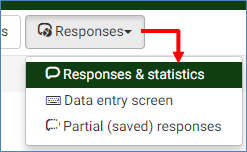
- Click on the ‘Responses’ button at the top, and choose ‘Responses & statistics’ as a dropdown item.
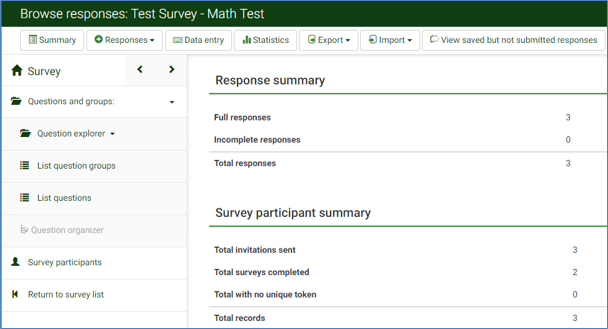
- You will be brought to the Browse responses page.
Individual Responses
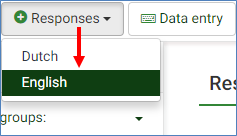
- To view the responses of each individual participant, click the ‘Responses’ button along the top of page, and pick the language you want (e.g. English).
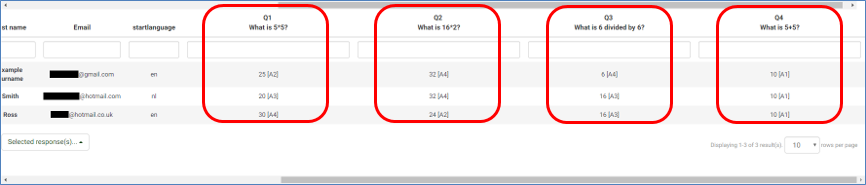
- You will be shown a page with a table of all your participants and their responses. Use the horizontal scrollbar to scroll right to view all of the participants’ responses to the survey’s questions.
Statistical Responses
- From the Browse responses page, click on the ‘Statistics’ button along the top of the screen.

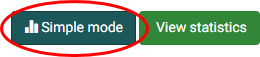
- You will then be brought to the Statistics page. If you wish to quickly view bar chart statistics, click the ‘Simple mode’ button in the top right corner of the screen.
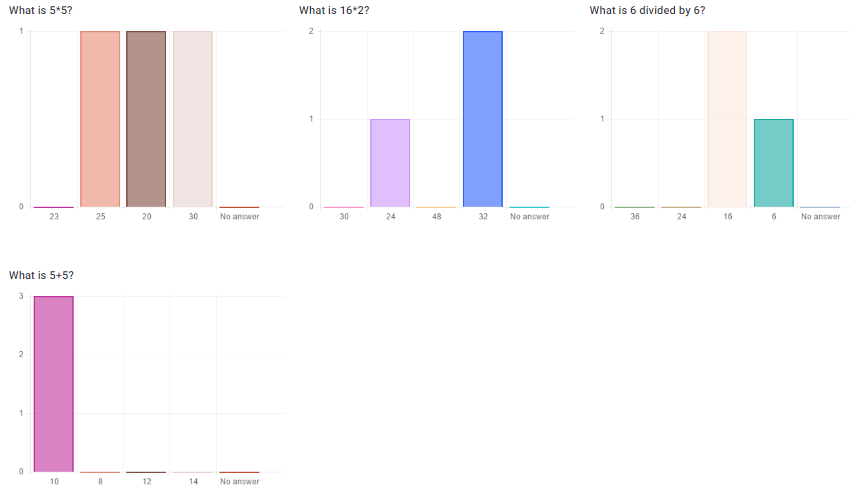
- You will be shown some simple bar chart statistics of answers to the questions in your survey. You may find these statistics adequate for your survey.
- If you wish to see some more in-depth statistics of your survey, first navigate your way back to the Statistics page. Under Output options, you may wish to choose the following options:
A. Show graphs – ON (default OFF)
B. Chart type – Optional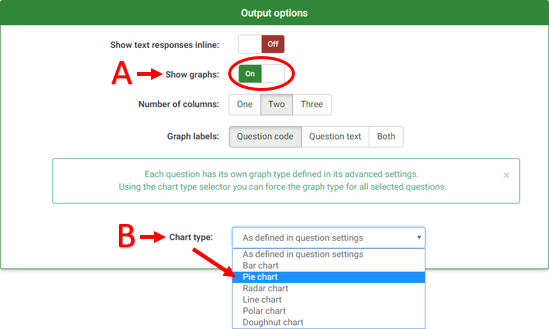
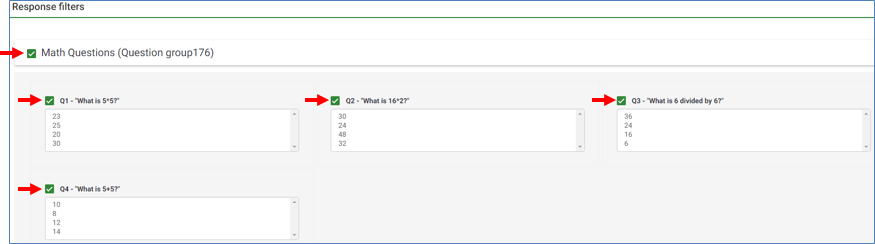
- Next, scroll to the bottom of the page where you will find Response filters. I am going to select all of my questions by clicking the checkboxes beside each question, or by simply clicking on the checkbox beside the question group.
- With the intended checkboxes ticked, click the ‘View statistics’ button in the top right corner of the screen.

- You will be shown the statistics from your survey including answer count, percentage and a chart for all questions and answers that were ticked in step 5.
