
Monitoring and tracking student usage and engagement can be done in Blackboard through several tools. These can all be primarily found in the Evaluation section in the Module Management menu underneath Module Tools
. 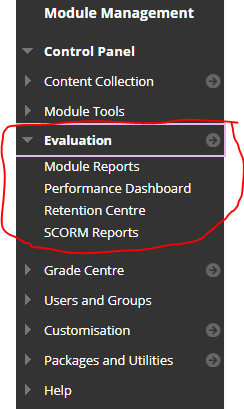
It contains four tools to give you information about how well your students are interacting with blackboard
Module Reports
There are a number of reports that can be run for each blackboard module.
- All User Activity inside Content Areas, displays a summary of all user activity inside content areas for a course. Use this report to determine which students are active in your course and which content areas they use.
- Course Activity Overview, displays overall activity within a single course, sorted by student and date. Data includes the total and average time spent per active student and the total amount and type of activity each student had in the course. Optionally, you can filter the report by one or more groups. Only students who are members of the selected groups are included in report results.
- Course Performance, displays how a single course performs against a selected set of goals.
- Overall Summary of User Activity, displays user activity for all areas of your course, as well as activity dates, times, and days of the week. Use this report to view student access as well as how often course tools are used.
- Single Course User Participation Report, displays the number of user submissions in your course for assignments, tests, discussions, blogs, and journals within the chosen time frame. You don’t need to grade an item for data to be included in the report. The data is provided in a Microsoft Excel spreadsheet.
NOTE – If no activity exists for an item type, no column appears. If no students submitted an assignment in the chosen time frame, no assignment column appears in the spreadsheet.
- Student Overview for Single Course, displays an individual student’s activity within your course, sorted by date. Data includes the total overall time a student spent in your course. You can view detailed information about a student’s activity, such as which items and content areas a student accessed and the time spent on each. Use this report to check a certain student’s course activity.
- User Activity in Forums, displays a summary of user activity in discussion forums in your course.
- User Activity in Groups, displays a summary of user activity in discussion forums in your course.
Some of the reports will only be useful if you have turned on the associated tools within the module.
Running a Report
Click on the down arrow next to the report name and chose Run.

You will then have to set a number of report specification which vary from report to report these can include:
- the output file type
- the people, groups to be included
- time frame to be included.
A typical Report specification would look like this.
![]()
Once you have entered all the specification click the Submit button to run the report. The report may take a while to run depending on the number of people included and the time frame it will cover.
You will get a “Please Wait” message while the report is being compiled. When it is complete you will either see it in a pop-up window or get a link to download the file. (Depending on the file type being generated.)
Have a go at running the different reports to see which ones give you the most useful information.
For more information on module reports take a look at the Blackboard Course Reports help page
Performance Dashboard
The Performance Dashboard gives you a quick overview of how all your student are progressing. It takes the form of a table with each member of the module on their own row.
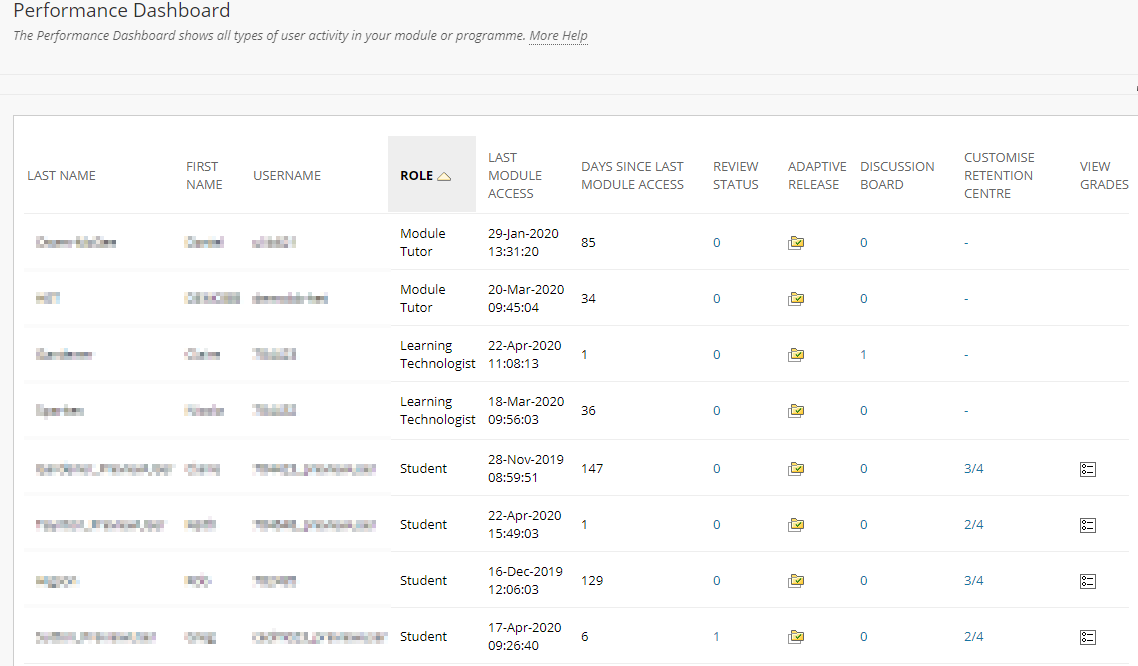
It will tell you the role each member has, when they last accessed the module and how many days ago that was, it will also tell you if they have never accessed the module.
The is a column that will tell you how many items with a review status they have ticked. (To add a Reviewed button to a piece of Blackboard Content, click on the down arrow by the name and choose Set Review status from the popup menu.)
The is a column with an adaptive release button for each student. If you click on it, it will show you all the content in the module and weather that particular student currently has access to it thought the adaptive release rules. It also shows the status of content that has review status enabled.
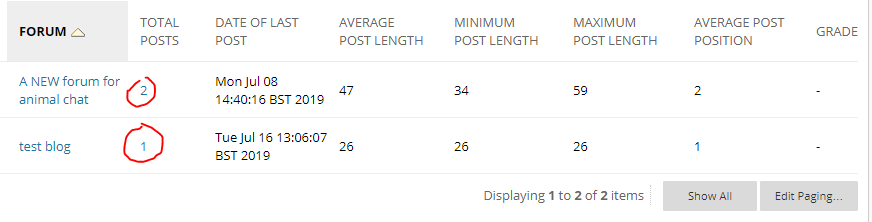
The discussion board column will show you how many forums the student has interacted with. If you click on the number, it will give you a list of those forums and how many posted have been made to each forum. You can click on these number it will take you to the posts.
The next column is Retention Centre. This will show you how many Retention Centre alters have been triggered. Clicking on the number will take you to the Retention Centre entry for that student. Click on the next section down to learn about Retention Centre.
The last column has a link to Grade centre.
For more help on the performance dashboard take a look a Blackboard help page
Retention centre
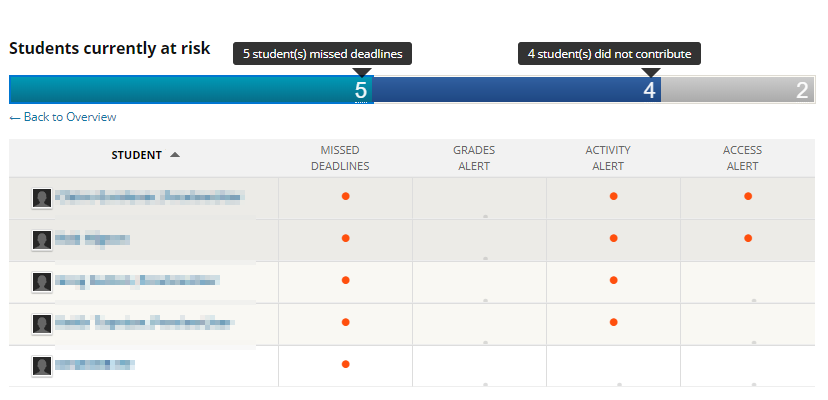
The retention centre is a list all the students on your module that are failing to interact with blackboard and therefor at risk of failing the module.
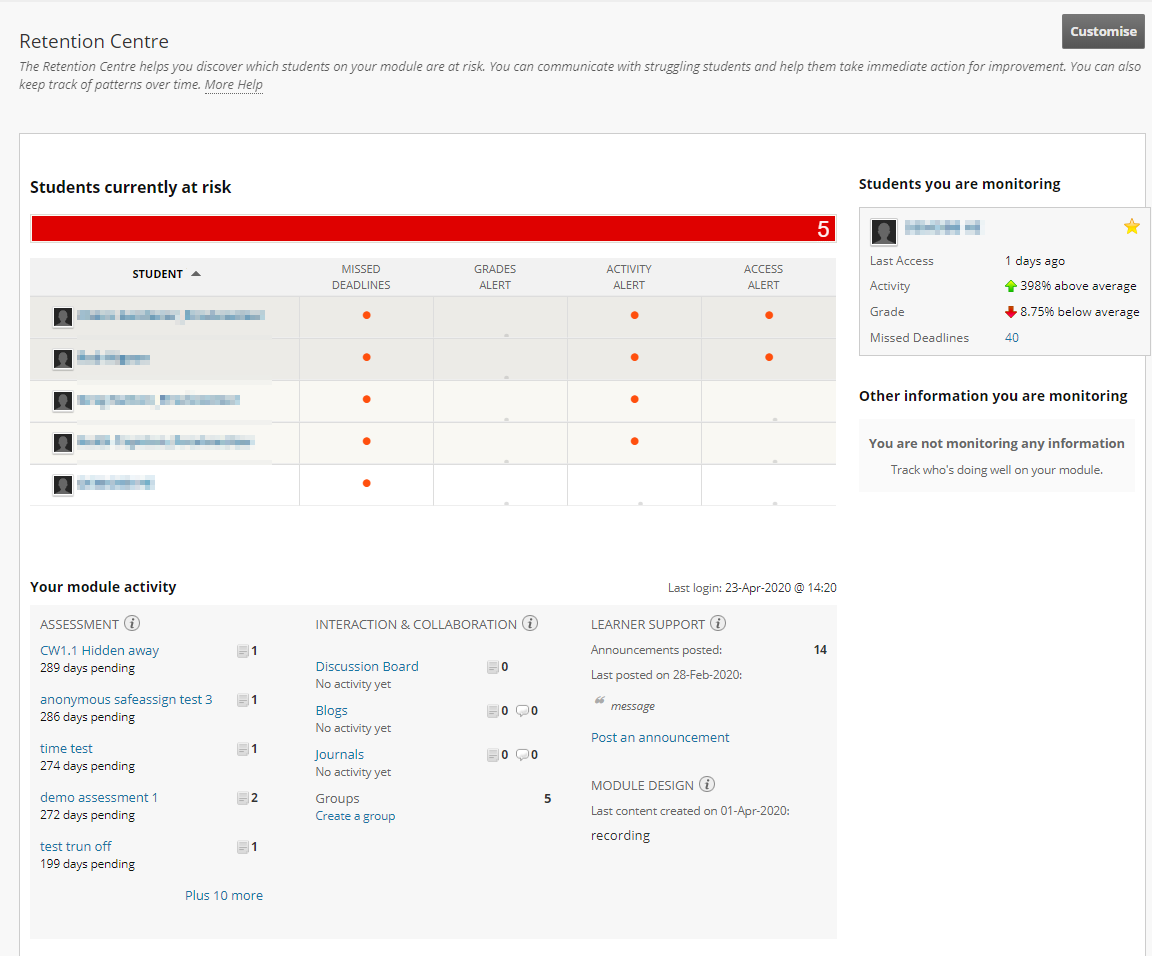
The retention centre shows report shows you how many of your students are failing and which alerts each of them have triggered in the Risk Table.
If you are monitoring any students, it will show You haw well they are doing compared with the rest of the class in a separate box.
It will also give you a list of things the students should have interacted with.
The Retention Centre can show 4 types of alert
- Missed deadlines
- Grade alerts
- Activity alerts
- Access alerts
Customising Alert Rules
The rules that govern the criteria for each alert to be triggered can be customised for each module. You customise the rules by clicking on the customise button ![]()
By default there will be one rule setup for each type of alert.
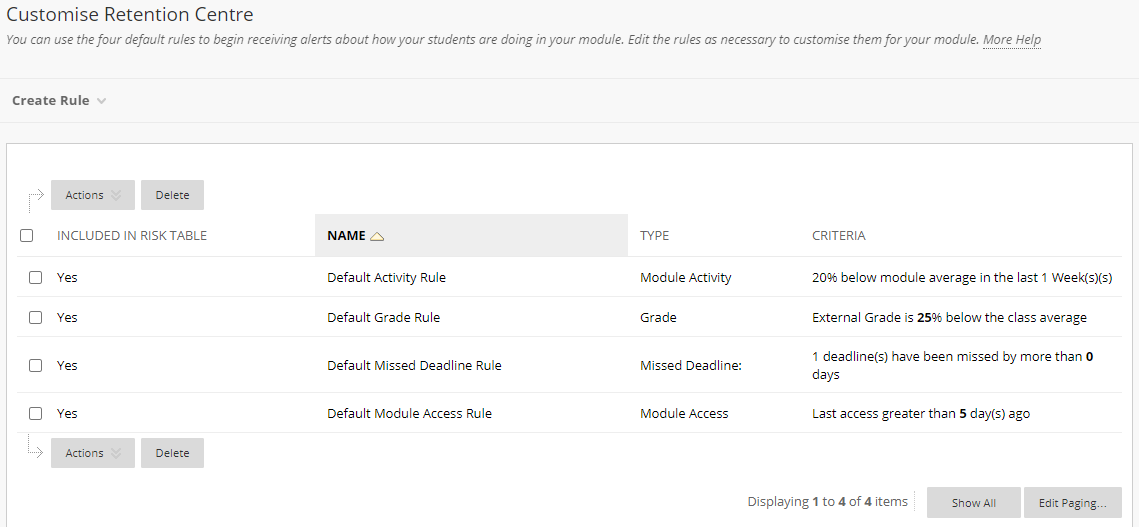
Depending on how your module is setup the default rules may be stable.
If you have a lot of optional activities with deadlines such as practice tests and different submission point for the same activity, then you may want to change the grade or deadline rules.
If your students are on placement for 10 weeks you may what to change the access rule.
Creating a new rule and editing existing one
You can create a new rule by clicking on the Create Rule button and choosing what type of rule you would like to create.
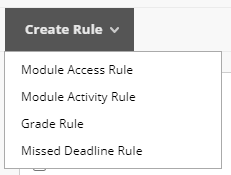
For every different rule type you have to give the rule a name and choose if you want to include it in the risk table (shown above).
You will then need to edit the rule criteria which has different options for each type of rule.

When you have finished creating the rule click the submit button to add it to the list.
To edit a rule, click on the down next to the rule name. and you will get a dropdown menu.
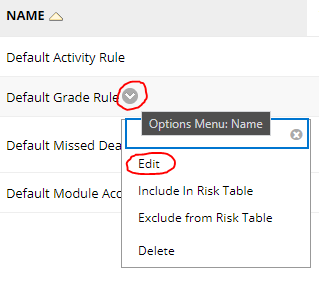
From the menu you can choose to edit the rule. You edit the rule in the same was as creating one as discussed above. You can also include or exclude the rule from the risk table from the menu and delete the rule.
The Risk Table
If you click on the bar at the top of the Risk Table it will give you a breakdown of how many students are triggering each activity rule.
If you click on the name of a student in the Risk Table, it will open up the students Retention Status page.
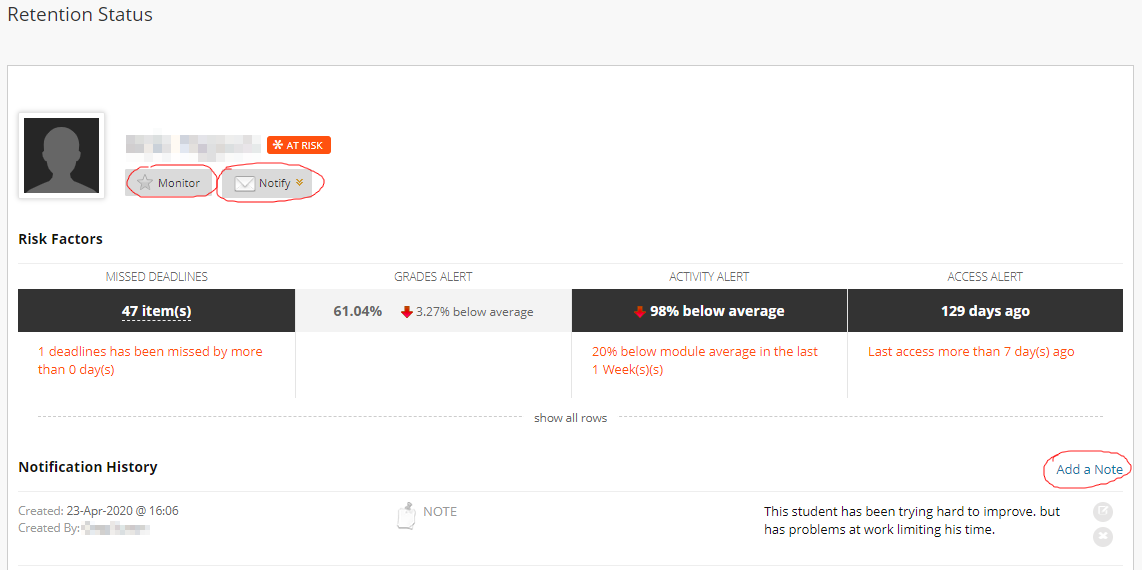
From this page you can choose to monitor the student, by clicking on the monitor button
You can notify the student that they are having problems. by clicking on the monitor button. This opens up a pre-written email to the student which you can edit before sending you can also send a blind carbon copy of the email to a specified email address. We recommend you include yourself, so you have a record of what you have sent.
You will see a full break down of the alerts that have been triggered by this student.
And at the bottom you may see nots. Here you also can add by clicking the Add a Note link.
For more help on Retention Centre try the Blackboard Retention Centre help pages
SCORM Reports
SCORM reports are rarely used. And will only be relevant for module that have SCORM content that utilises the reporting features. We are currently not aware of any module that use this functionality.