
In accordance with the Anonymous Marking policy, this page contains some advice and guidance to get you started.
Summary
This Anonymous Marking checklist summarises the changes that need to take place.
Example text for student communications
We have prepared some exemplar statements to go into the module handbooks.
We recommend that you email students who haven’t submitted 48 hours before the due date and if they fail to submit.
- Example text – reminder of submission date
- Example test – non-submission
- Guide on how to email non-submitters in Turnitin.
eSubmission Systems – Quick tips to start with Anonymous Marking
Here are some key instructions on how to setup submission points, mark and moderate in the University eSubmission systems (Turnitin, Blackboard and PebblePad)
These sections have three parts: setting up, marking and moderating anonymously.
Anonymous Marking – Student Communications PowerPoint for programmes
Please use this Anonymous Marking Overview PowerPoint in your communications with students.
Anonymous Marking and E-Marking FAQ
Click here for anonymous marking and emarking FAQ
Turnitin
.
The instructions below illustrate they key principles for the Anonymous marking policy, please visit the full Turnitin guidance for further instructions
For full information on how to setup a Turnitin assignment, refer to our full guide.
Simply, when you setup an anonymous Turnitin assignment you have to select Yes to Enable Anonymous Marking.
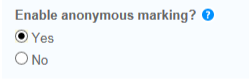
If you forget to add this at the point of setting it up you can only turn it on if nobody has submitted to the assignment. Once one person has submitted this setting is locked and can’t turned on or off.
Names will not be displayed during marking and marks will not be copies to grade centre until the post date.
1. Go to the module where with the Turnitin assignment is.
2. Click on Control panel to open the panel
3. Click on Grade Centre
4. Click on Full Grade Centre
 5. Find the assignment and make sure the column is hidden to students It should have a circle with a line red line through it in the column heading. (this will ensure students don’t see results until the post date)
Now navigate to the assignments in Turnitin
1. Click on Module tools to open the panel
2. Click on Turnitin assignments
3. Click on the assignment you wish to mark. (You will see the list of submitted papers with the students names anonymised)
4. Click on the paper you wish to mark. (This will take you to the marking page with the students names anonymised)
5. Mark the paper and enter a score.
6. Click an arrow at the top to go to the next paper and continue until all the papers are marked.
1. Go to the module where with the Turnitin assignment is.
2. Click on Control panel to open the panel
3. Click on Module tools to open the panel
4. Click on Turnitin assignments
5. Click on the assignment you wish to mark. (You will see the list of submitted papers with the students names anonymised)
6. Click on the paper you wish to mark. (This will take you to the marking page with the students names anonymised)
7. Moderating the paper and change the score if necessary.
8. Click an arrow at the top to go to the next paper and continue until all the papers are moderated.
Blackboard Assignments
The instructions below illustrate they key principles for the Anonymous marking policy, please visit the full Blackboard Assignment guidance for further instructions
For full guidance on setting up a Blackboard submission point, please refer to the full guide.
SImply, anonymous marking is enabled by clicking on the Enable Anonymous Marking check box in the Grading Options section of a Blackboard Assignment. Set the date when Anonymous Marking will be turned off. This should be after internal moderation has taken place.
Students are informed that the paper will be marked anonymously, and when viewing results are told if the paper was marked anonymously. If the grade is changed after the anonymity is removed the student are informed. You should only change grade after the students name is revealed by comity and all changes should be logged.
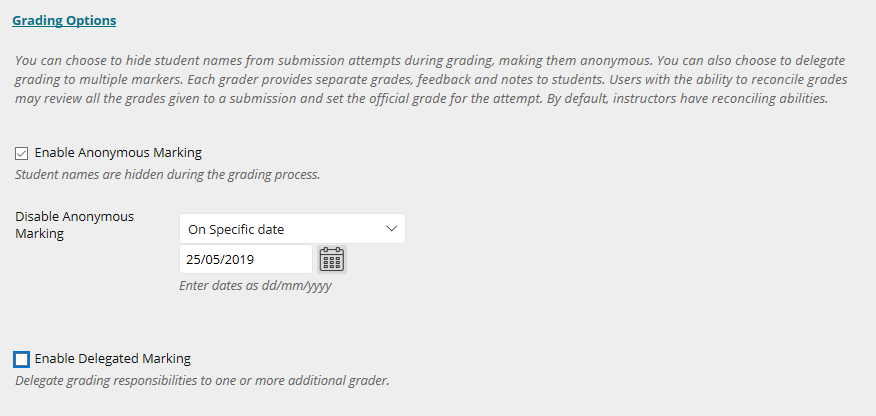
In the grading options section you also have the option to turn on delegated marking. This will enable you to distribute the marking workload.
1. Go to the module where with the Blackboard assignment is.
2. Click on Control panel to open the panel
3. Click on Grade Centre
4. Click on Assignments
5. Find the assignment and make sure the column is hidden to students It should have a circle with a line red line through it in the column heading. (this will ensure students don’t see results until the post date)
6. Go back to the control panel and under grade centre click on Needs grading (you will see a list of papers to mark. The anonymous papers will not show the students names)
7. Click on an anonymous students. (The paper will open up with names removed. The ID number you see is not the students ID)
8. Mark the paper and enter a mark
9. Click an arrow at the top to go to the next paper and continue until all the papers are marked.
1. Go to the module where with the Blackboard assignment is.
2. Click on Control panel to open the panel
3. Click on Grade Centre
4. Click on Assignments
5. Find the assignment
6. In the assignment column heading click on the arrow
7. Click on Grade Attempts. (a random paper will open up with names removed. The ID number you see is not the students ID)
8. Moderating the paper and change the score if necessary.
9. Click an arrow at the top to go to the next paper and continue until all the papers are moderated.
When it’s time to reveal the grades to students
1. Click on Grade Centre
2. Click on Assignments
3. Find the column for the assignments you wish to release the grades for
4. Click on the arrow in the column heading and choose Hide/show from students. The circle with a red line through if will disappear and the grades will be released.
Blackboard Tests
The instructions below illustrate they key principles conducting tests aligned with the Anonymous marking policy, please visit the the full guidance to Tests for further instructions
With Blackboard test there is no difference during setting up the test to an un-anonymous test.
1. Set up the Blackboard Test as normal.
To truly mark the Blackboard test anonymously you will first have to hide the student’s names in grade centre. (this means that students names will be disassociated from all other assignments during the marking period) this is to avoid seeing student names associated to their grades.
1. Go to the module where with the Blackboard assignment is.
2. Click on Control Panel to open the panel
3. Click on Grade Centre
4. Click on Full Grade Centre
5. Click on Manage
6. Choose Column Program
7. Select First name and Last name form the list of columns.
8. Click Show/Hide and choose Hide all selected columns.
9. Click on Submit (Now the students names will be removed from grade centre.)
Now you need to mark the papers. Do NOT use Needs Grading or click on an attempt next to a student’s name in grade centre
1. Click on Grade Centre
2. Click on Tests
3. Find the assignment and make sure the column is hidden to students It should have a circle with a line red line through it in the column heading. (this will ensure students don’t see results until the post date)
4. Click on the arrow in the column heading and choose Grade attempts with usernames hidden.
5. Mark the papers (User names will be hidden)
6. Click an arrow at the top to go to the next paper and continue until all the papers are marked.
When moderating a paper do NOT click on an attempt next to a student’s name in grade centre
1. Go to the module where with the Blackboard assignment is.
2. Click on Control Panel to open the panel
3. Click on Grade Centre
4. Click on Tests
5. Find the column for the test you wish to Moderate
6. Click on the arrow in the column heading and choose Grade attempts with usernames hidden.
7. Moderate the papers (User names will be hidden)
8. Click an arrow at the top to go to the next paper and continue until all the papers are moderated.
If the student names are hidden, once you have completed moderation you will have to unhide them in grade centre. (Before doing this make sure there are no other test being marked)
1. Click on Grade Centre
2. Click on Full Grade Centre
3. Click on Manage
4. Choose Column Program
5. Select First name and Last name form the list of columns.
6. Click Show/Hide and choose Show all selected columns.
7. Click on Submit (Now the students names will be placed back in grade centre.)
When it’s time to reveal the grades to students
5. Click on Grade centre
6. Click on Tests
7. Find the column for the test you wish to release the grades for
8. Click on the arrow in the column heading and choose Hide/show from students. The circle with a red line through if will disappear and the grades will be released.
PebblePad
The instructions below illustrate they key principles for setting up a PebblePad portfolio aligned with the Anonymous marking policy, please visit the the full guidance to PebblePad for further advice and guidance.
In PebblePad you can’t set up an anonymous assignment all you can do is hide the students names in a workspace. This will hide all the student’s names in a workspace for all the assignments. If the workspace is linked to a Blackboard program, then students’ names will be hidden for all cohorts and all the assignments.
1. Go to the module where with the PebblePad assignment is.
2. Click on the Atlas link (where ever you created it.) you should now see the PebblePad workspace.
3. Click on Managers
4. Click on Modify permissions and scroll down to the Anonymity section.
5. Deselect View authors details for all users
6. Go down to the bottom and click save. Now all authors details will be removed from the submission details
7. Set up the assignment as normal.
If you have an Atlas grade centre column in Blackboard, grades will appear there once an item is grades in atlas. To avoid seeing student names associates to their grade you should either hide the grade centre column from instructors or hide the student names until after moderation.
To hide the grade centre column from instructors
1. Go to the module where with the Blackboard assignment is.
2. Click on Control panel to open the panel
3. Click on Grade Centre
4. Click on Full Grade Centre
5. Find the Atlas column
6. Click on the arrow in the column heading
7. Choose Hide from Instructors View
To hide the students names
1. Go to the module where with the Blackboard assignment is.
2. Click on Control panel to open the panel
3. Click on Grade Centre
4. Click on Full Grade Centre
5. Click on Manage
6. Choose Column Program
7. Select First name and Last name form the list of columns.
8. Click Show/Hide and choose Hide all selected columns.
9. Click on Submit (Now the students names will be removed from grade centre.)
There is no difference to marking you will just not be presented with the authors names.
There is no difference to marking you will just not be presented with the authors names. Once moderation is complete you will have to unhide the student’s names.
1. Go to the module where with the PebblePad assignment is.
2. Click on the Atlas link (where ever you created it.) you should now see the PebblePad workspace.
3. Click on Managers
4. Click on Modify permissions and scroll down to the Anonymity section.
5. Select View authors details for all users
6. Go down to the bottom and click save. Now all authors details will be added to the submission details.
If you have an atlas grace centre column you will also have to reveal that.
If you hid the Grade Centre column
1. Click on Grade Centre
2. Click on Full Grade Centre
3. Click on Manage
4. Choose Column Program
5. Select the Atlas column form the list of columns.
6. Click Show/Hide and choose Show all selected columns.
7. Click on Submit (Now the Atlas column will appear in grade centre.)
to unhide the student’s names (only do this if there is not another assignment that requires names to be hidden)
1. Click on Grade Centre
2. Click on Full grade centre
3. Click on Manage
4. Choose Column Program
5. Select First name and Last name form the list of columns.
6. Click Show/Hide and choose Show all selected columns.
7. Click on Submit (Now the students names will be placed back in grade centre.)